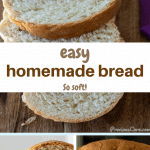
Easy Sandwich Bread Recipe
Published Feb 27, 2026
This post may contain affiliate links. Please read our disclosure policy.
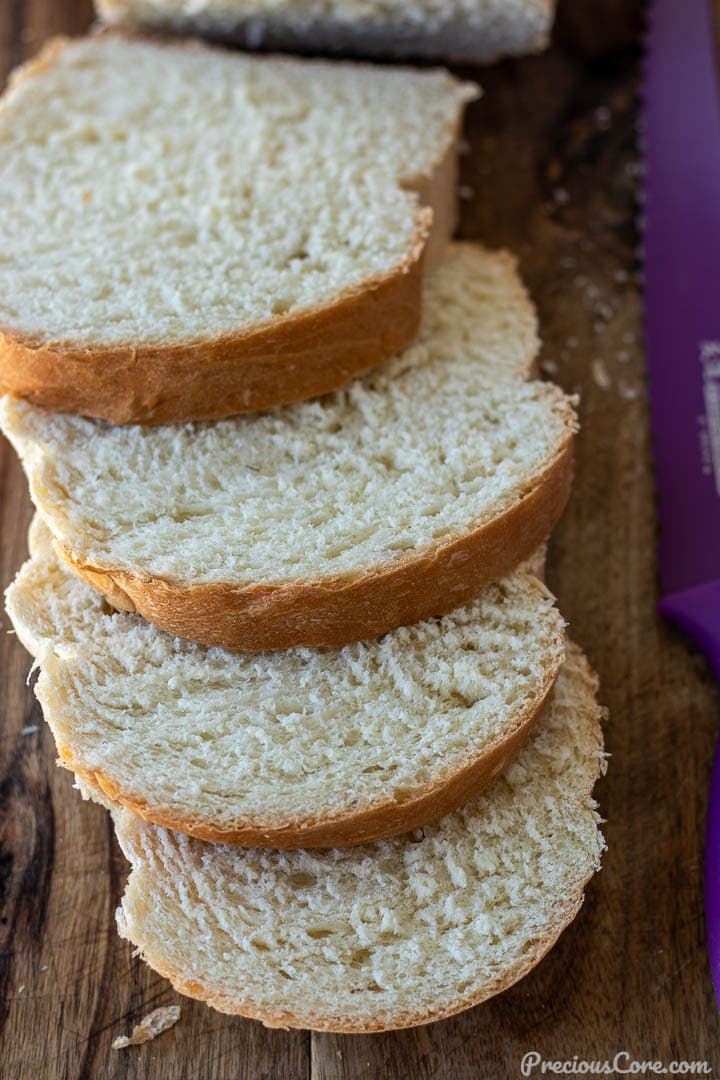
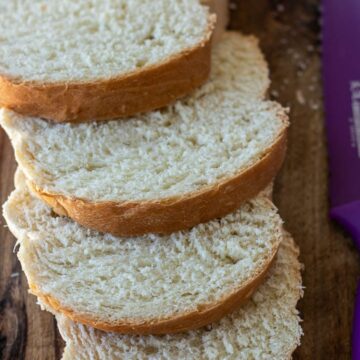
The best Easy Sandwich Bread Recipe. This is a basic bread recipe that even beginner bakers can bake! It is so soft and fluffy. You MUST eat some warm with butter slathered on top!
Use this easy homemade sandwich bread to make Chicken Mayonnaise Sandwich or some Savory French Toast. So worth it!
Table of Contents
Easy Sandwich Bread Recipe
I have made bread so many times in my life and I wanted to share with you a really easy homemade sandwich bread recipe anyone can make. This classic white sandwich bread is incredibly versatile. It is much easier than making sourdough bread since you don’t need to use sourdough starter!
This is a no-fuss, great recipe for beginners wanting to make their own bread for the first time. It only takes about 2 hours from start to finish. Who would’ve known soft white sandwich bread was so easy to make from scratch?
I love this recipe because it proves you don’t need a bread machine to make your own sandwich bread. All you need is some loaf pans, about 6 cups of flour, and a few other ingredients! And if you want to stock up and make a lot of fresh bread, it is easy to double the recipe.
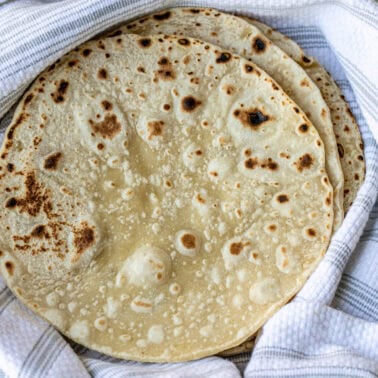
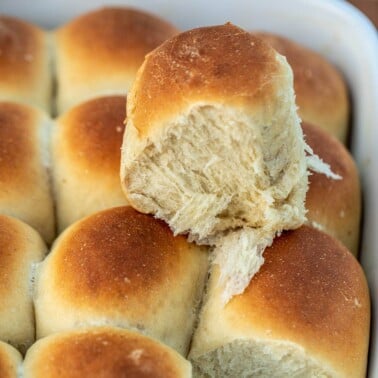
Speaking of bread recipes, if you want to expand your skills, I have some different recipes you’ll surely love! Check them out: Dinner Rolls, Homemade French Bread, and Easy Milk Bread. And yes, I even have a cinnamon rolls recipe! Here: Cinnamon Rolls with Cream Cheese Frosting.
This bread is perfectly fluffy and great for slathering on some butter, for sandwiches, for dunking in stews and soups. It is even better the next day! You can also make French Toast with it or spread melted butter and garlic to make garlic bread. The possibilities are endless.
Ingredients For This Easy Sandwich Bread Recipe
You only need 7 simple ingredients for this Easy Homemade Bread.

1. All-purpose or bread flour. I tested this recipe with both all-purpose and bread flour and both work well. Use bread flour if you can find it, but do not fuss about it (King Arthur is a good brand).
2. Yeast. This is one of those classic yeast breads. So, you will need active dry yeast or instant dry yeast (rapid rise) to make it.
3. Sugar. Granulated sugar or cane sugar is fine.
4. Oil. Any neutral tasting works for homemade bread. Vegetable oil, canola oil or corn oil are great options. You can also use light olive oil.
5. Lukewarm water. This recipe uses water rather than whole milk. For best results, you need water that is slightly warm, above room temperature. It shouldn’t be too hot or too cold.
6. Salt. Salt is really important for bringing out the flavors.
7. Nutmeg. I add a little nutmeg to this bread recipe. It adds a nice flavor to the bread without being overpowering so use it if you can.
Recipe Substitutions
- Flour: Aside from the suggested AP flour or bread flour, you can adjust the recipe to include whole wheat flour. However, I don’t suggest substituting the entire amount. Instead, only use 50% wheat flour and AP or bread flour for the rest.
- Yeast: You can use fresh yeast instead of instant dry yeast or active dry yeast. However, you will need to use twice as much for it to get the job done.
- Salt: I suggest table salt, but you can use sea salt in a pinch.
- Sugar: You can substitute with honey if you wish.
How to Make This Easy Sandwich Bread Recipe
1. Combine yeast and warm water in a large mixing bowl to create the yeast mixture. Let sit for 5 – 10 minutes.
2. Add the rest of the ingredients – the dry ingredients and oil. Mix with a wooden spoon to combine.
3. Transfer the mixture onto a clean surface and knead for 5 minutes. If needed, sprinkle a little bit of additional flour to create a lightly floured surface. Be careful not to add too much flour! Then, grease a large bowl with oil, covering all sides of the bowl so the dough doesn’t stick. Place the dough inside.
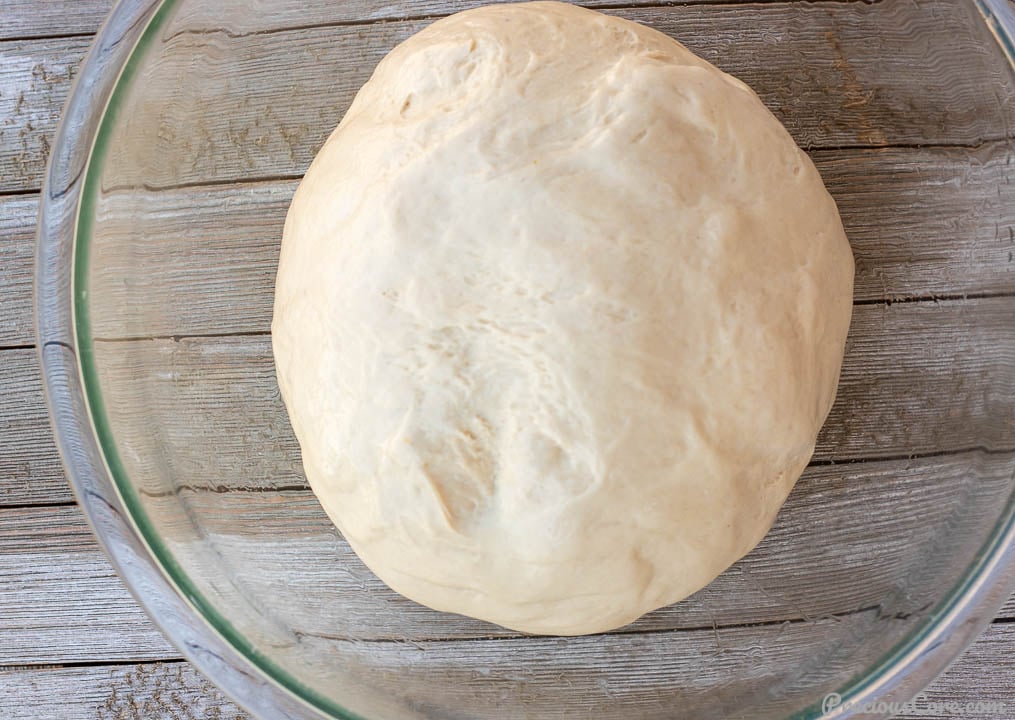
4. First Rise: Cover the dough with a large plastic bag or plastic wrap and let it rise in a warm place until doubled in size. This prevents the top of the dough from drying out. Keep in mind that the rise time depends on your environment, so it can take 1 to 2 hours.
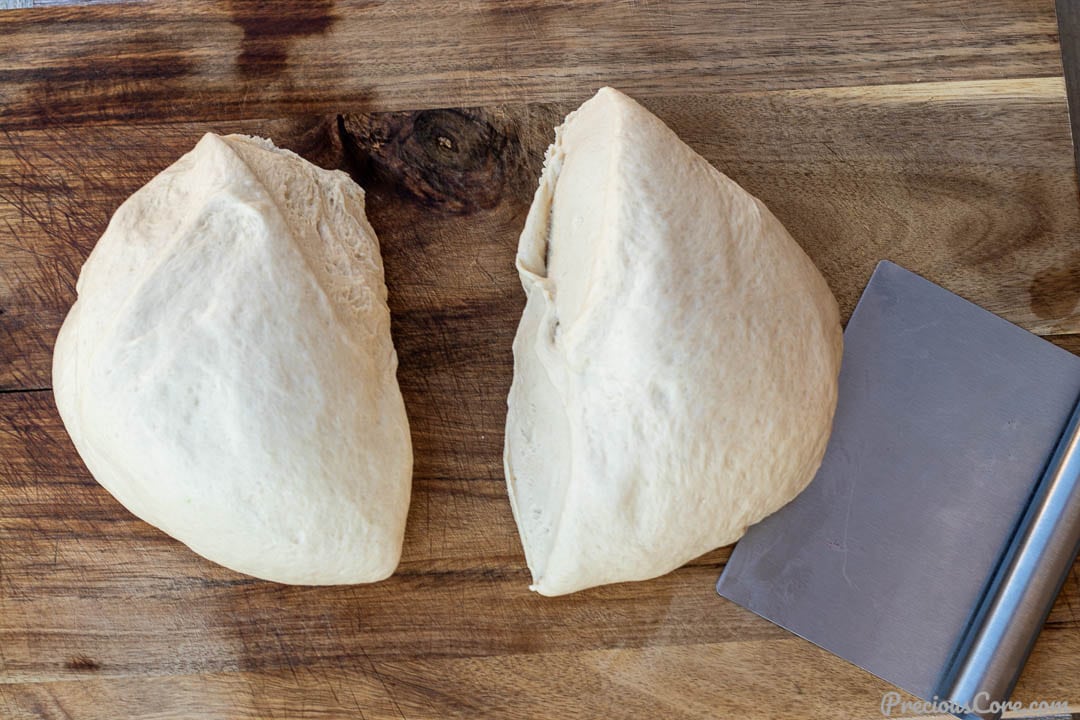
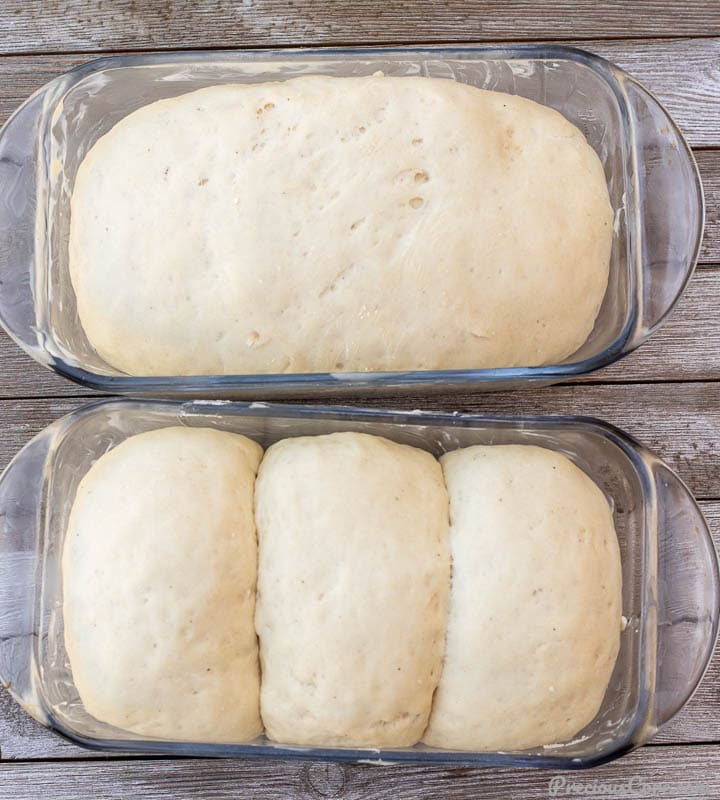
5. For the next step, punch the dough to deflate, divide into 2 equal portions, and shape the dough. By now, you shouldn’t need to work on a lightly floured work surface, as the dough shouldn’t be sticky. Put the dough into the loaf shaped bread pans (or loaf tin). Place the seam side down in the pan.
6. Second Rise: Let the dough rise a second time for 20 minutes, almost reaching the top of the loaf pan.
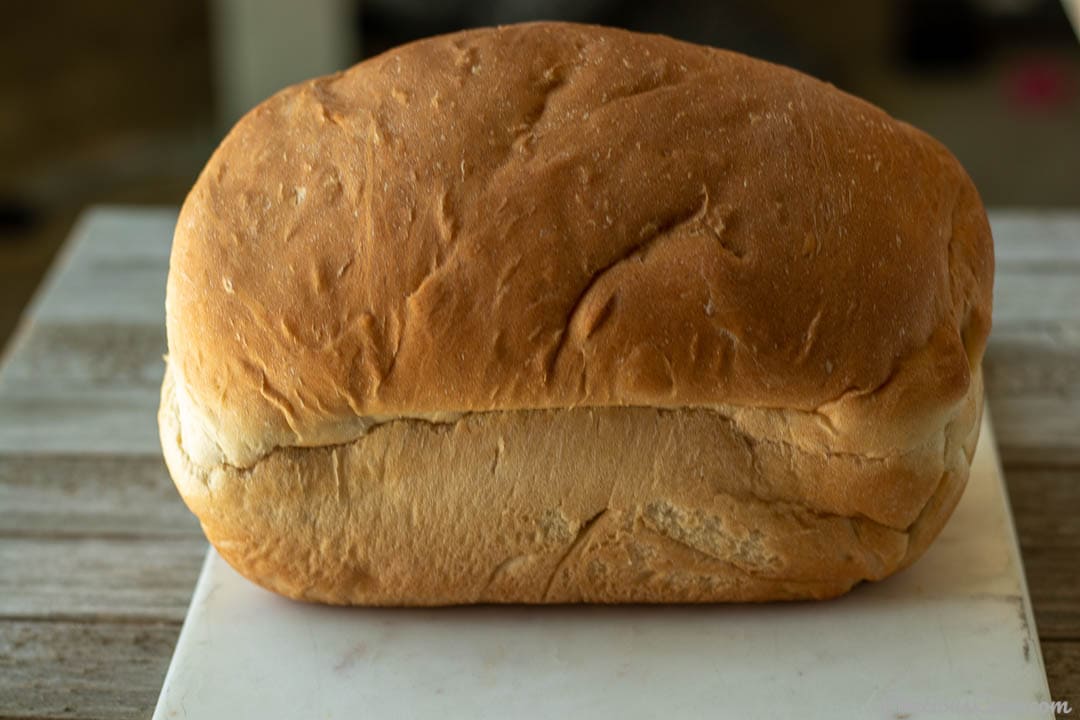
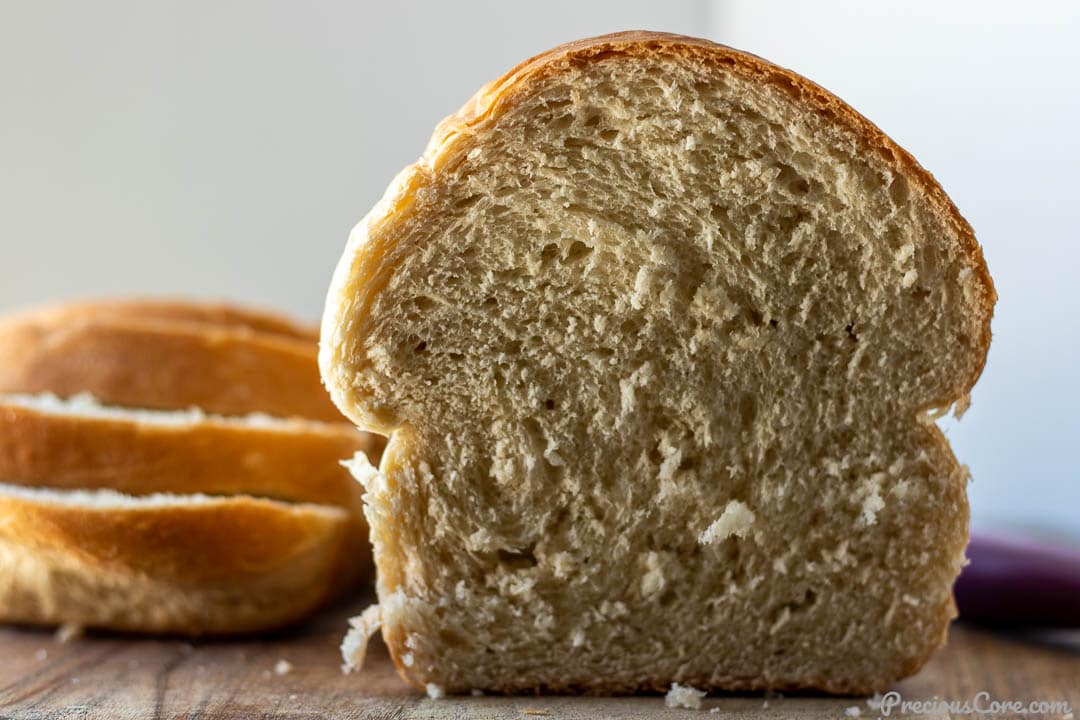
7. Egg wash the dough if you wish. Bake it in a preheated oven set to 350 degrees Fahrenheit until golden brown. You can also check the bread’s internal temperature with a thermometer for doneness. It should be at least 195F internally. Transfer the pans to a cooling rack. A wire rack will help it cool much faster!
Tips For Perfect Easy Homemade Bread
- If you plan to eat the bread rather soon, you can store it in a bread bag. For longer storage, wrap it in plastic wrap then place it in an airtight container. It does not need to be refrigerated; the fridge will dry it out.
- Make sure to use a sharp knife when cutting it, ideally a serrated knife. This will give you the best slices because it is much easier to cut them evenly.
- While the bread goes through its first rise, you can also cover it with a damp kitchen towel. A damp towel with a small amount of water will prevent a crust from forming on the dough while it rises.
- Once you finish kneading the dough, you can perform a windowpane test to see if it is sufficiently kneaded. Stretch the dough and hold it up towards a light or the window. You should be able to stretch it thin enough to see the light through it without it tearing.
- If you want to make this in the bowl of your stand mixer, make sure to use a dough hook attachment. Be careful using a bowl of a stand mixer because it is easy to accidentally overwork the dough this way. I suggest keeping it on low speed just to form the dough and then knead it by hand.
Watch How To Make Easy Sandwich Bread
Watch me making Easy Sandwich Bread Recipe in the video below. If you haven’t subscribed to my YouTube channel yet, SUBSCRIBE so you do not miss any of my videos.

More Homemade Bread Recipes
If you love this easy sandwich bread, you’ll also love these easy homemade bread recipes:


If you make this recipe please leave a star rating below. Your rating helps others find the recipe plus I love hearing from you! Thank you!
Easy Sandwich Bread Recipe
Ingredients
- 6 cups bread or all purpose (plain) flour 750 grams
- 2 cups lukewarm water 110 degrees F ( 43 degrees C)
- 1 tablespoon active dry yeast
- 1/4 cup vegetable oil canola oil, corn oil, peanut oil would work
- 1/4 cup granulated sugar or cane sugar
- 2 teaspoons salt
- 1/4 teaspoon freshly grated nutmeg
Instructions
Proof the yeast.
- Pour the lukewarm water into a large mixing bowl. Add the yeast and let it sit for 5 minutes. It is going to look creamy.
- To the mixing bowl add the sugar, oil, flour and salt. Mix with a wooden spoon to combine.
- Transfer the mixture onto a clean working surface. Knead to form a dough. If it is too hard, sprinkle on a little water. You need the dough be be soft and slightly sticky. Softer dough yields softer bread.
- On the flip side, if the dough is too sticky and difficult to handle, sprinkle a little flour on the dough and knead, sprinkling on a little flour at a time if needed until the dough can be handled without being too sticky.
- Knead the dough for 5 minutes.
- Rub oil all over a large mixing bowl. Place the dough into the bowl and move the dough around so the oil gets all over it, Cover with a plastic wrap and keep in a warm place to rise.
- To create a warm place I usually turn my oven on for about 1 minute then I turn it off. This creates the perfect atmosphere for yeasted dough to rise.
- Let the dough rise for 1-2 hours until about doubled in size.
- Punch the dough to remove the excess air then divide the dough into two equal portions.
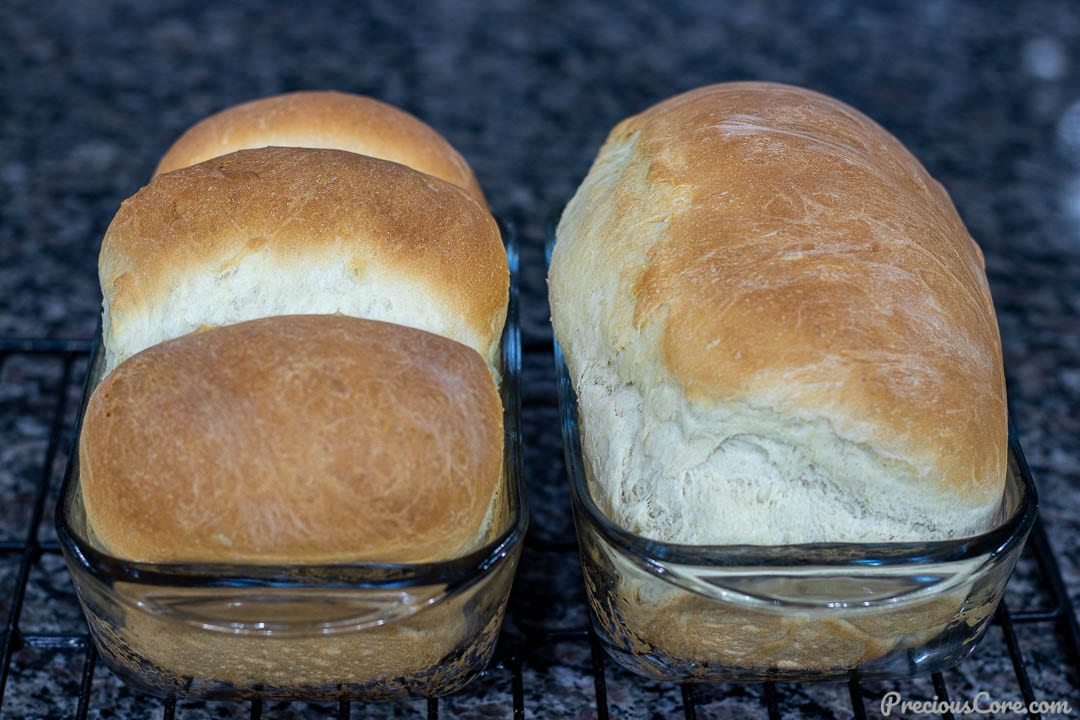
- Generously grease two 9 by 5 inch loaf pans.
Shape the dough and put into prepared loaf pans.
- Divide one portion into 3 equal portions. Shape it into ovals then place the ovals in one loaf pan (check out the video to see how I do this.)
- Roll out the other portion with a rolling pin then roll it with your hands to form a log. Tuck in the edges of the log. Place the log into the other loaf pan.
- Let the loaves rise in a warm place for another 20 minutes.
- Preheat oven to 350 degrees Fahrenheit or 180 degrees Celsius.
- Place the loaves into the oven and bake for 30-35 minutes until golden brown. Check around 30 minutes – if the bread is browning fast loosely cover with aluminum foil.
- Remove loaves from oven and let them rest for about 5 minutes on a cooling rack then remove loaves from pan and enjoy!


Absolutely easy and is the best bread I have ever taste. If this is what bread supposed to taste like, what have I been eating all my life? ( I cut the recipe in half.)
I’m so glad you enjoyed it, Michelle. Homemade bread is unbeatable! Thank you for the feedback!
Trying this now very easy to make, thank u for Sharing ur skills with us
Hope you enjoy, Tina!
I’ve been baking bread for 50 years but even though I have favorite recipes, I still enjoy trying out new ones. I clicked on this recipe of yours because of the picture showing a loaf of bread divided into 3 pieces. That is how my mom used to form her loaves once the kids had moved out. She would then freeze the separated bread so none of it was ever wasted. Your recipe makes delicious toast and is extremely easy to follow, probably great for new bread bakers. I’ll try it with my granddaughter…thanks!
Thank you Lisa. So glad you loved it!
I’m looking for a recipe that works with a bread machine. Will this recipe do it or do I have to tweak it? Thank you!
Hi Mary, this recipe will work in a bread machine but you might need to half all the ingredients so you do not overwhelm your bread machine. Hope this helps.
This bread recipe is easy to follow as well as delicious! No more store bought bread for me! Thanks you for all your recipes! They are all really good!
You are welcome, Ru. Thank you for the feedback.
Keep up the good works
Thank you. I will.
Thank you so much for this bread recipe! First time I’ve made bread! I was gonna share a picture but don’t know if I can. It’s delicious. Do you store it in a bag?
Yes, I store in large Ziploc bags. It’s important for the bag to be airtight. So glad this recipe was helpful!
Thank you for sharing your recipes
You’re welcome, Francesca!
Lovely bread
Please can you show me how to use oat for bread with out flour and yeast
Thanks
You are welcome.
I just tried the home made bread recipe now….very good ..thank you ma’am
So glad to hear that, Jumoke!