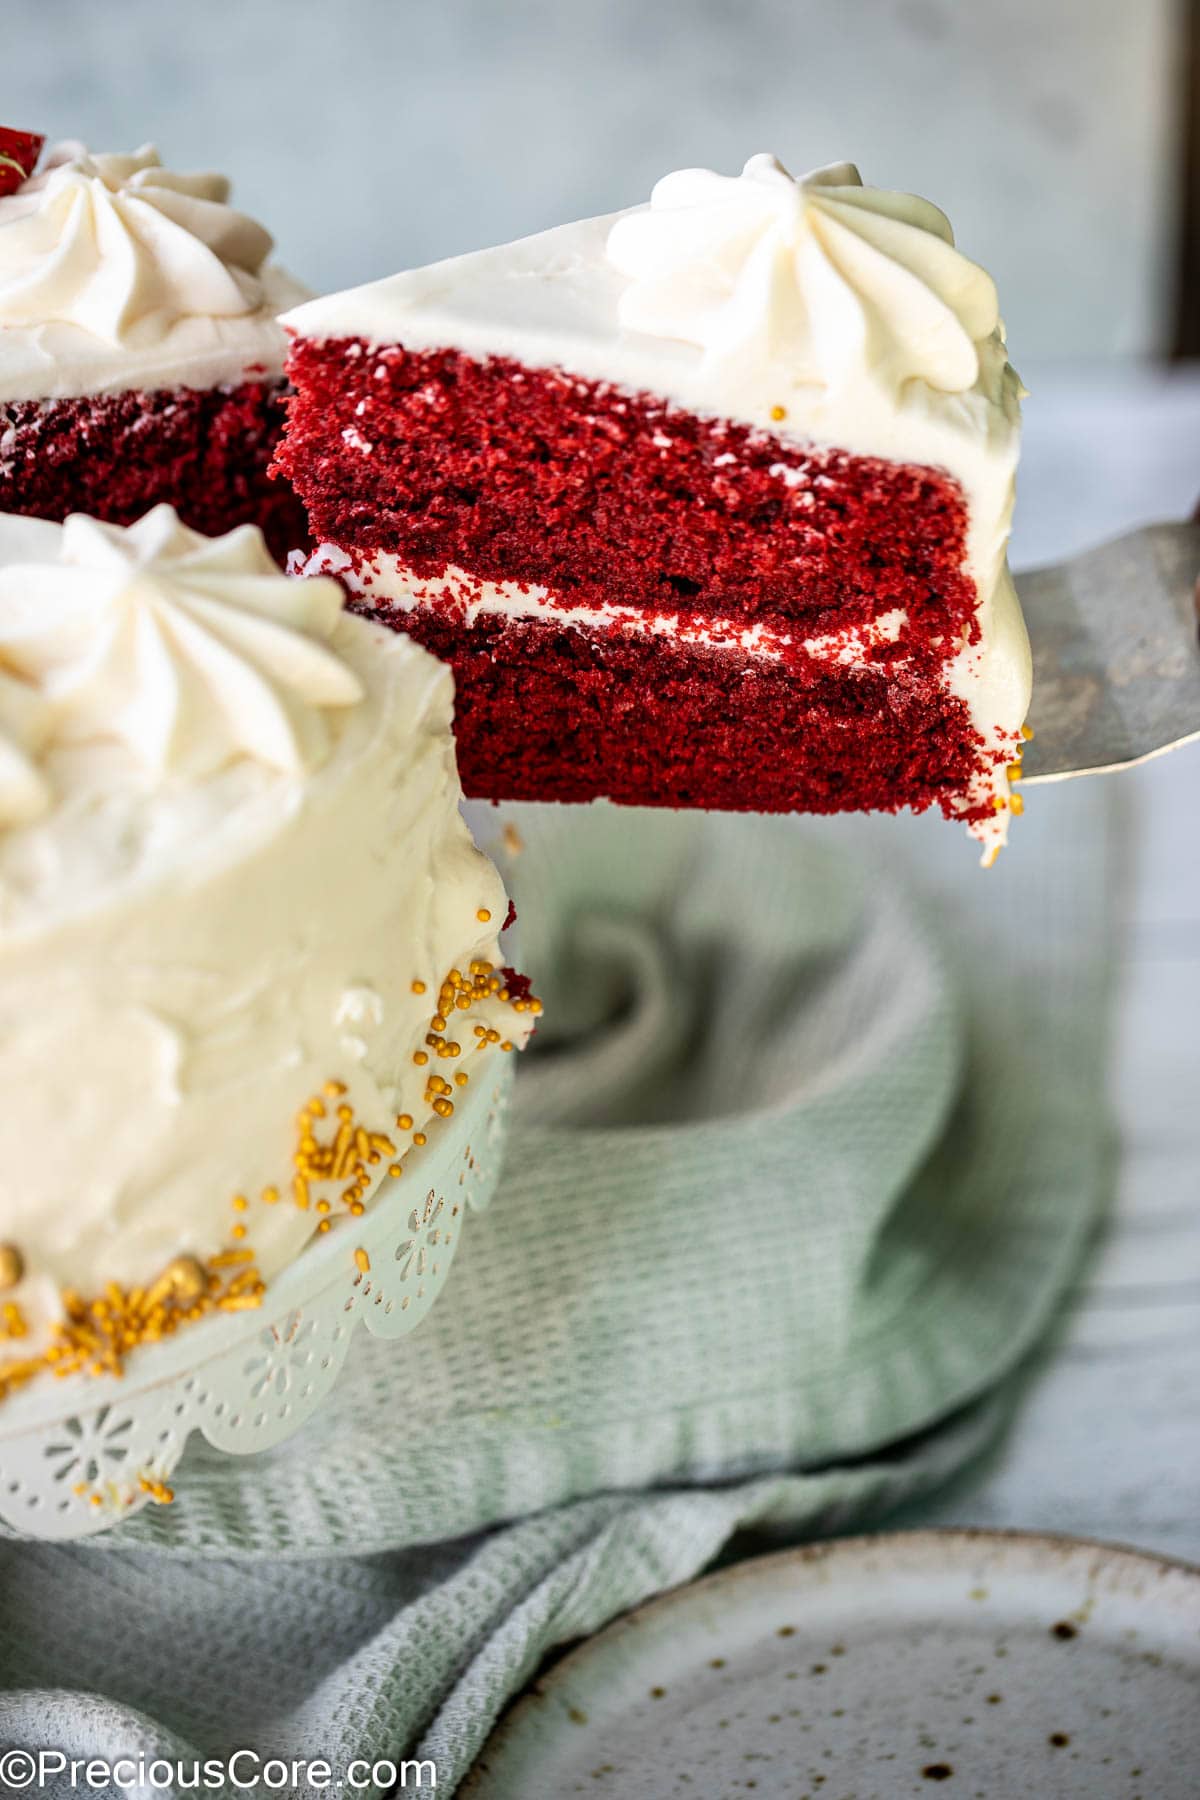
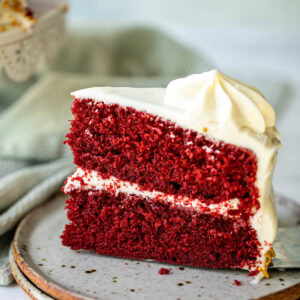
Red Velvet Cake Recipe Without Buttermilk
Published Jun 07, 2024
Updated Sep 23, 2025
This post may contain affiliate links. Please read our disclosure policy.
No buttermilk, no problem! Make my Red Velvet Cake Recipe Without Buttermilk, and you’ll love this decadent cake.
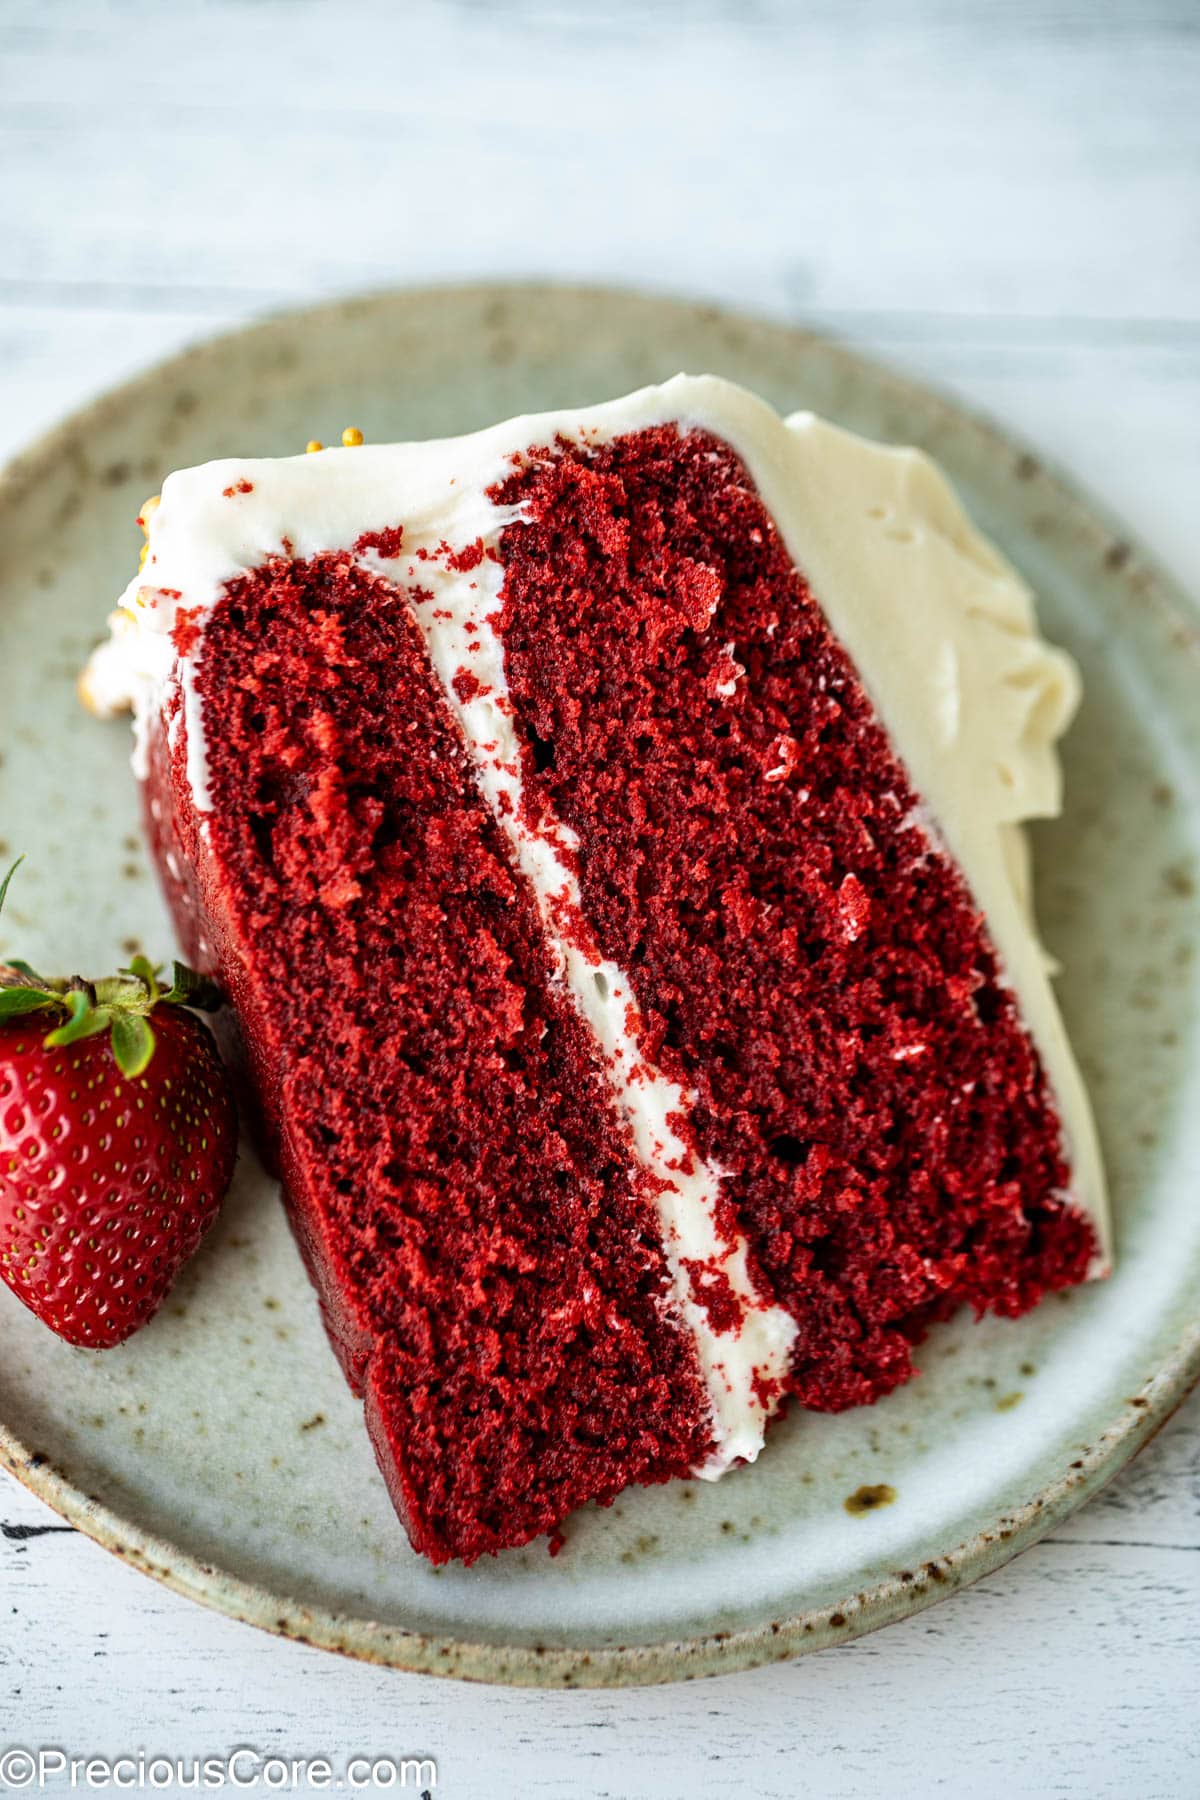
The tangy, silky cream cheese frosting is the golden final touch that ties the cake layers together. Add this dessert to your repertoire of go-to desserts.
This cake is perfect for the holidays, Valentine’s Day, Mother’s Day, weddings, or when you just want some really good cake. It has such a show-stopping appearance due to the deep red color. Upon taking one bite, you’ll be in heaven with its incredible flavor.
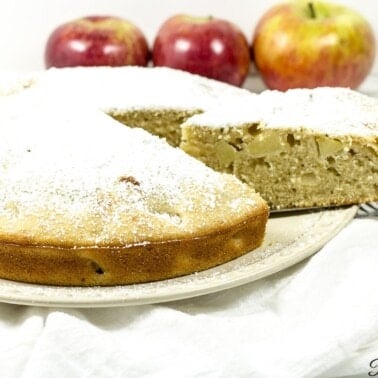
Where are all of my cake people at? If you enjoy cakes as much as I do, you should try my other cake recipes, such as my best Yogurt Cake, Old Fashioned Carrot Cake, or Vanilla Sponge Cake!
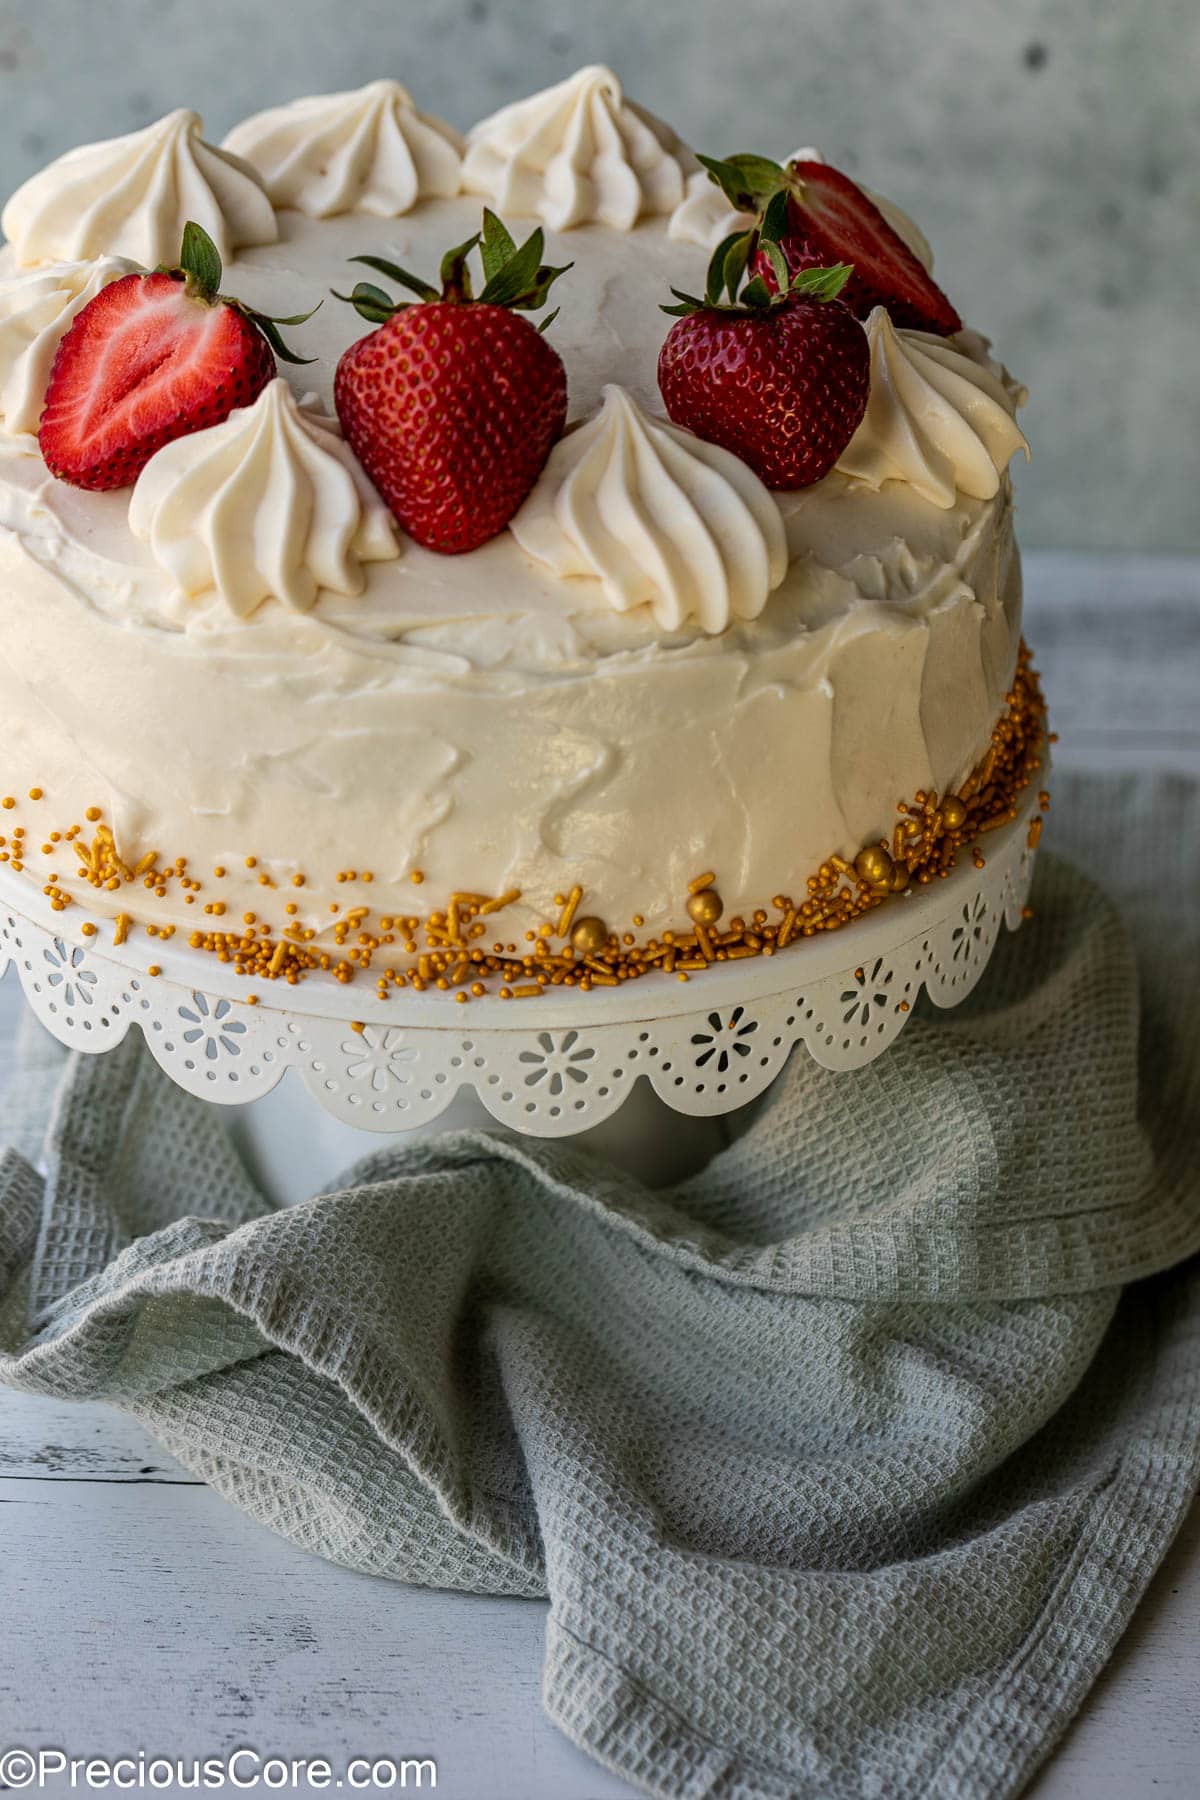
Table of Contents
- Red Velvet Cake Recipe Without Buttermilk
- Why This Recipe Works
- Ingredients For Red Velvet Cake Without Buttermilk
- Recipe Variations
- Substitutions
- How To Make The Best Red Velvet Cake Recipe Without Buttermilk
- Tips For Perfect Red Velvet Cake
- FAQs About Red Velvet Cake
- Serving
- More Cake Recipes
- Red Velvet Cake Recipe Without Buttermilk Recipe
Red Velvet Cake Recipe Without Buttermilk
I wanted to create a red velvet cake recipe without buttermilk to show you that you can still make a perfect cake without buttermilk. I am extremely pleased with the flavor and texture of this cake.
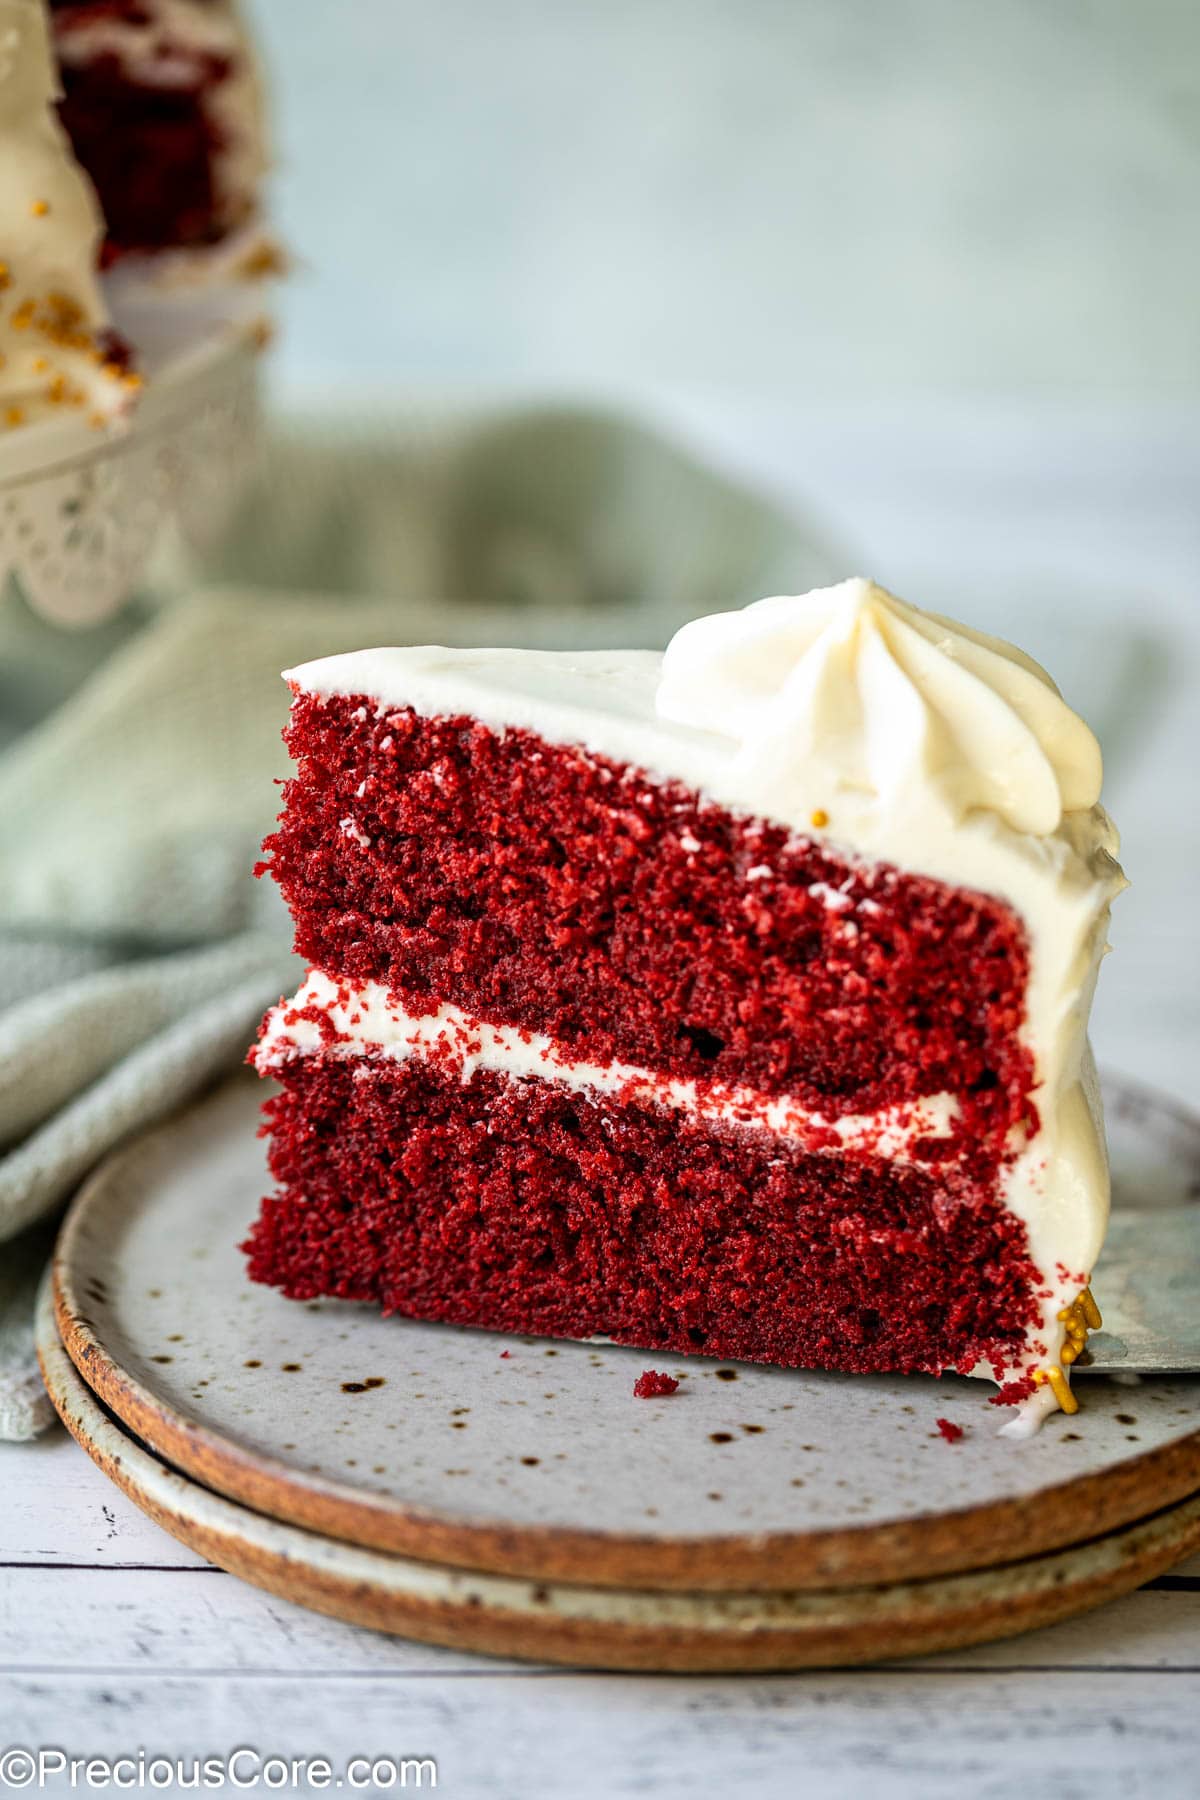
This incredibly fluffy, moist cake has a complex flavor with hints of vanilla extract and cocoa powder. It is also very buttery and soft.
The frosting recipe is the perfect complement to the cake, creating a perfect balance of sweetness and tanginess. With this recipe, you don’t need to worry about dry cake or dense cake. The cake texture is perfect!
Why This Recipe Works
- Perfect for any occasion: This classic red velvet cake paired with cream cheese frosting recipe is perfect for any occasion; it is one of those desserts that is suitable year-round since it doesn’t require seasonal ingredients. And it’s a timeless cake recipe that works well as a birthday cake or wedding cake. Your guests will surely look forward to it for the entire event. This recipe serves 12 people.
- No buttermilk: The best part is that you won’t need buttermilk for this recipe. This recipe is perfect if you don’t have buttermilk on hand and don’t feel like going to the store. Instead, my recipe uses vinegar to activate the baking soda.
- Adaptable: You can bake this red velvet cake in round 8 or 9 inch cake pans or you can adapt the recipe to bake in cupcake pans for cupcakes. You can also adapt the recipe to make a red velvet sheet cake! More tips on baking in a different cake pan below.
- Anybody can make it! Red velvet cake is one of the most classic cake recipes you can make. You might typically leave this cake up to the pros, but you’ll be happy to know that anybody can make it, even beginner bakers! Whether you have experience or not, this recipe can become your go-to red velvet cake recipe.
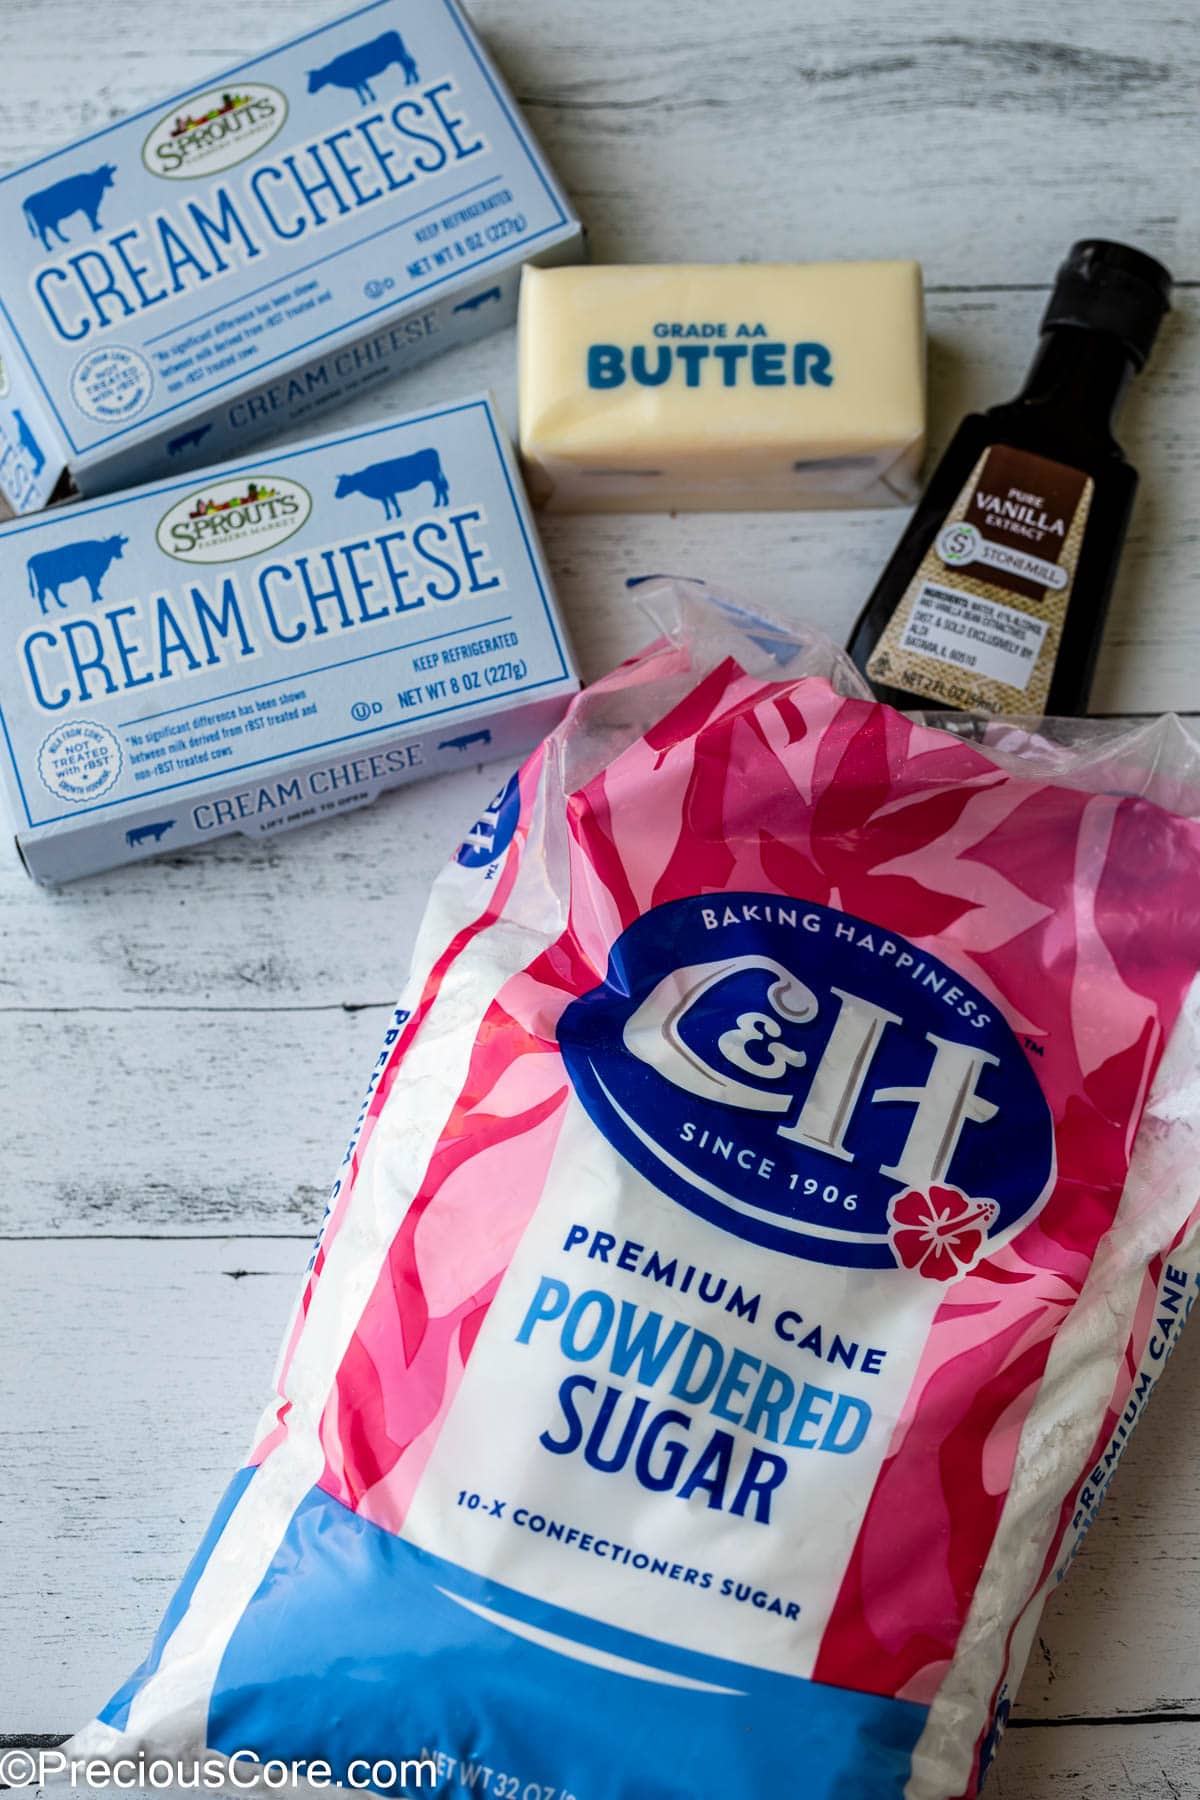
Ingredients For Red Velvet Cake Without Buttermilk
In the recipe card below, you can find every ingredient and the exact amounts needed.
Here are some notes on the most important components of the cake batter:
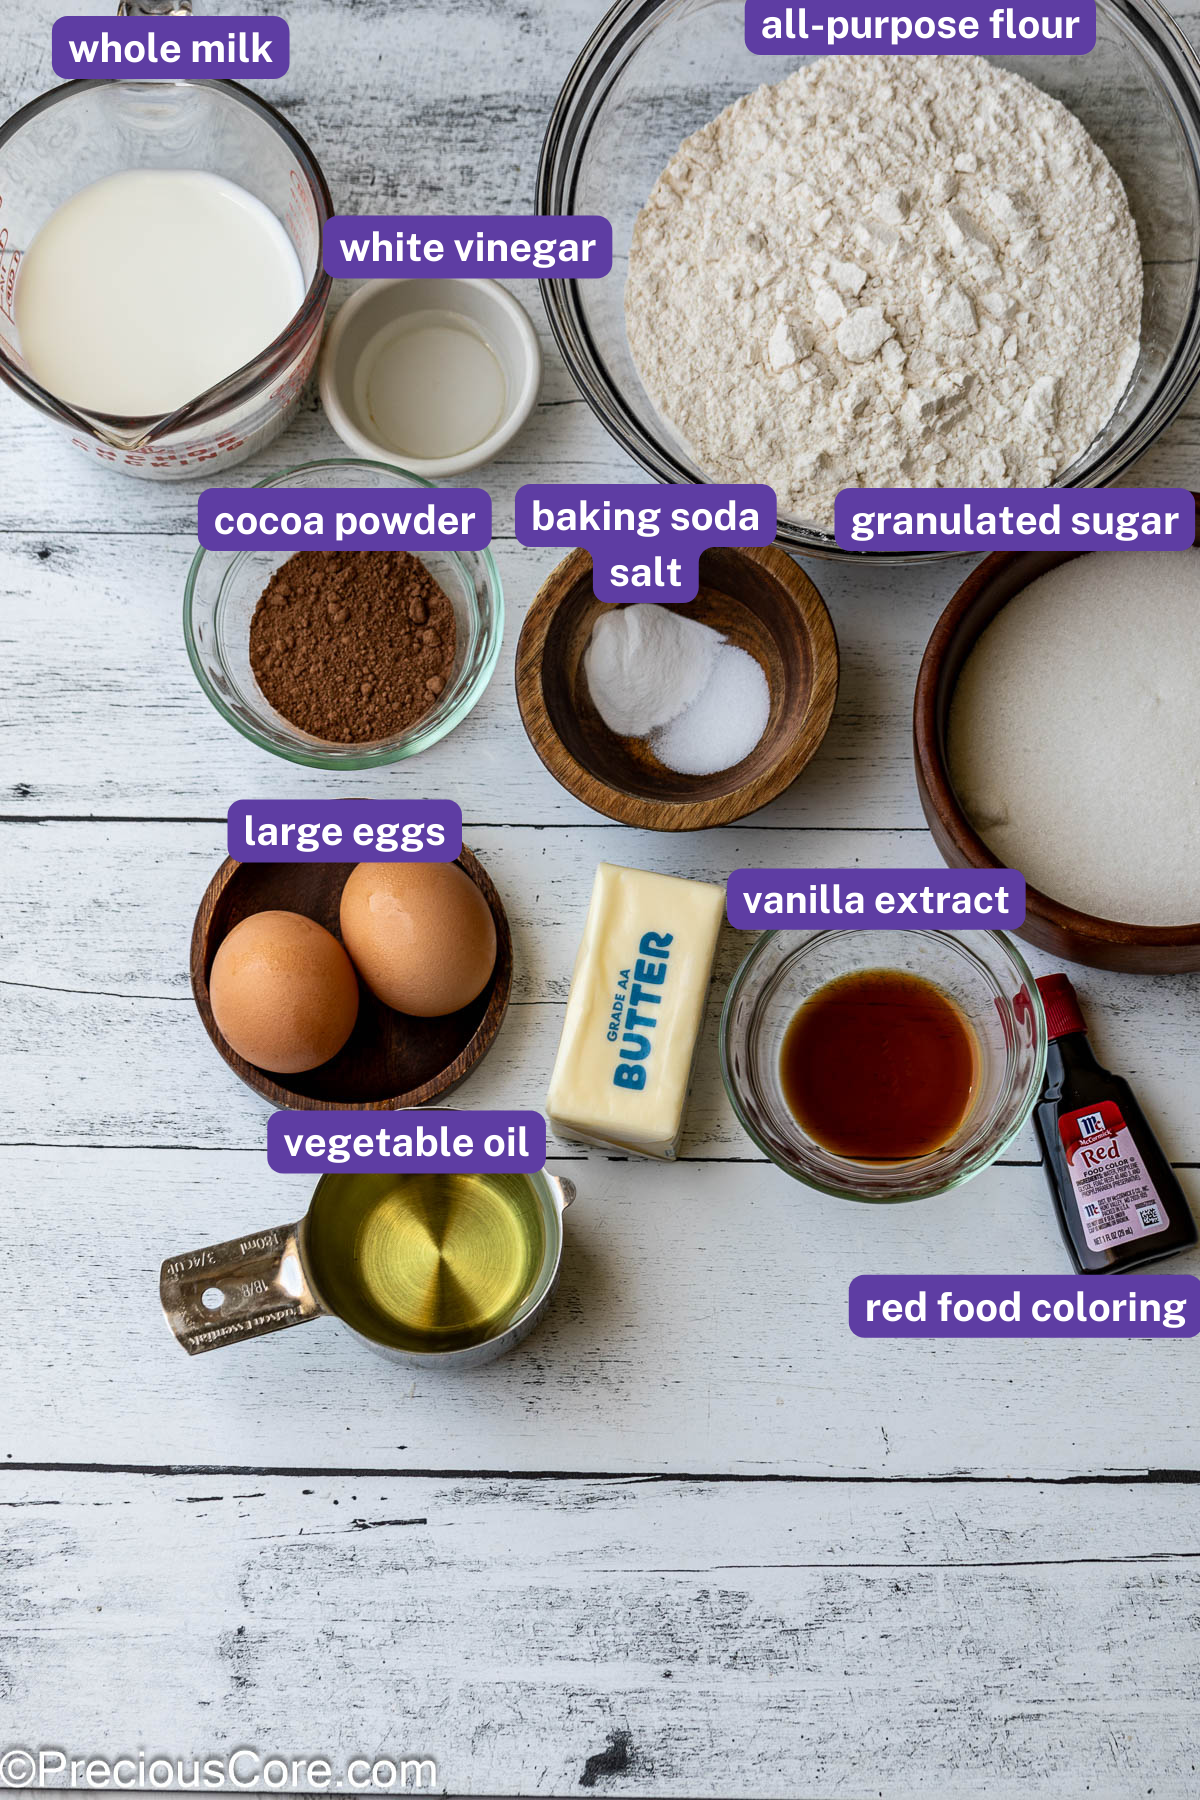
- Flour and sugar: Flour and sugar are standard baking ingredients. For this recipe, I use all-purpose flour and regular granulated sugar, which are the most accessible and versatile.
- Red food coloring: It wouldn’t be a red velvet cake without some red coloring! I find that the easiest way is to use red food dye. However, I will discuss another way to dye the cake red in the substitution section below.
- White vinegar: In this recipe, as we are not using buttermilk, white vinegar is a crucial ingredient. Without this acidic agent, baking soda (also known as bicarbonate of soda) would not be able to create the necessary chemical reaction for the cake to puff up and rise.
- Cocoa powder: The addition of natural cocoa powder not only imparts a luxurious and complex flavor to the cake but also helps the cake become tender without giving it an overpowering chocolate flavor.
You’ll also need ingredients for the frosting, such as cream cheese, unsalted butter, powdered sugar, and vanilla! Check the printable recipe card below for all the ingredients and step-by-step instructions.
It’s crucial that the frosting ingredients are at room temperature before you begin making it. Otherwise, the cream cheese will be lumpy, and it will affect the cake’s overall presentation.
Recipe Variations
- Frosting type: If you are not into cream cheese frosting, no worries. You can also make a classic vanilla buttercream or chocolate frosting to decorate the cake instead! Both of these options still work if you make a layer cake, and they taste delicious!
- Make red velvet cupcakes: You can always fill the cake batter into cupcake liners instead. This recipe will give you about 24 standard cupcakes!
- Add mix-ins: Get creative and add mix-ins to the batter before you bake the cake. For instance, fold in chocolate chips, pecans, or sprinkles.
Substitutions
- Red dye: You can use red liquid food coloring or red gel food coloring to make red velvet cake the right color. For a natural alternative without standard food coloring, you can also purchase beetroot natural food coloring. However, this method might make the color more muted because the beetroot oxidizes when it bakes.
- Milk: I recommend using whole milk because its fat helps give the cake a tender crumb. However, you can use skim milk or even almond milk, and it will still turn out great!
- Oil: Any neutral oil will work, such as vegetable oil, canola, corn, grapeseed, or light olive oil.
- Vinegar: If you don’t have white vinegar, you can use apple cider vinegar in a pinch or lemon juice.
- Flour: Although it will produce a slightly different texture, you can use cake flour instead of all-purpose flour.
Love cake? Also check out my recipe for Salted Caramel Cake and Butter Pecan Pound Cake.
How To Make The Best Red Velvet Cake Recipe Without Buttermilk
Here, I break down how to make this royal treat step by step! You’ll be amazed at how easy this is!
1. Preheat oven and prepare baking pans. In a medium mixing bowl, combine the milk and vinegar and set aside.
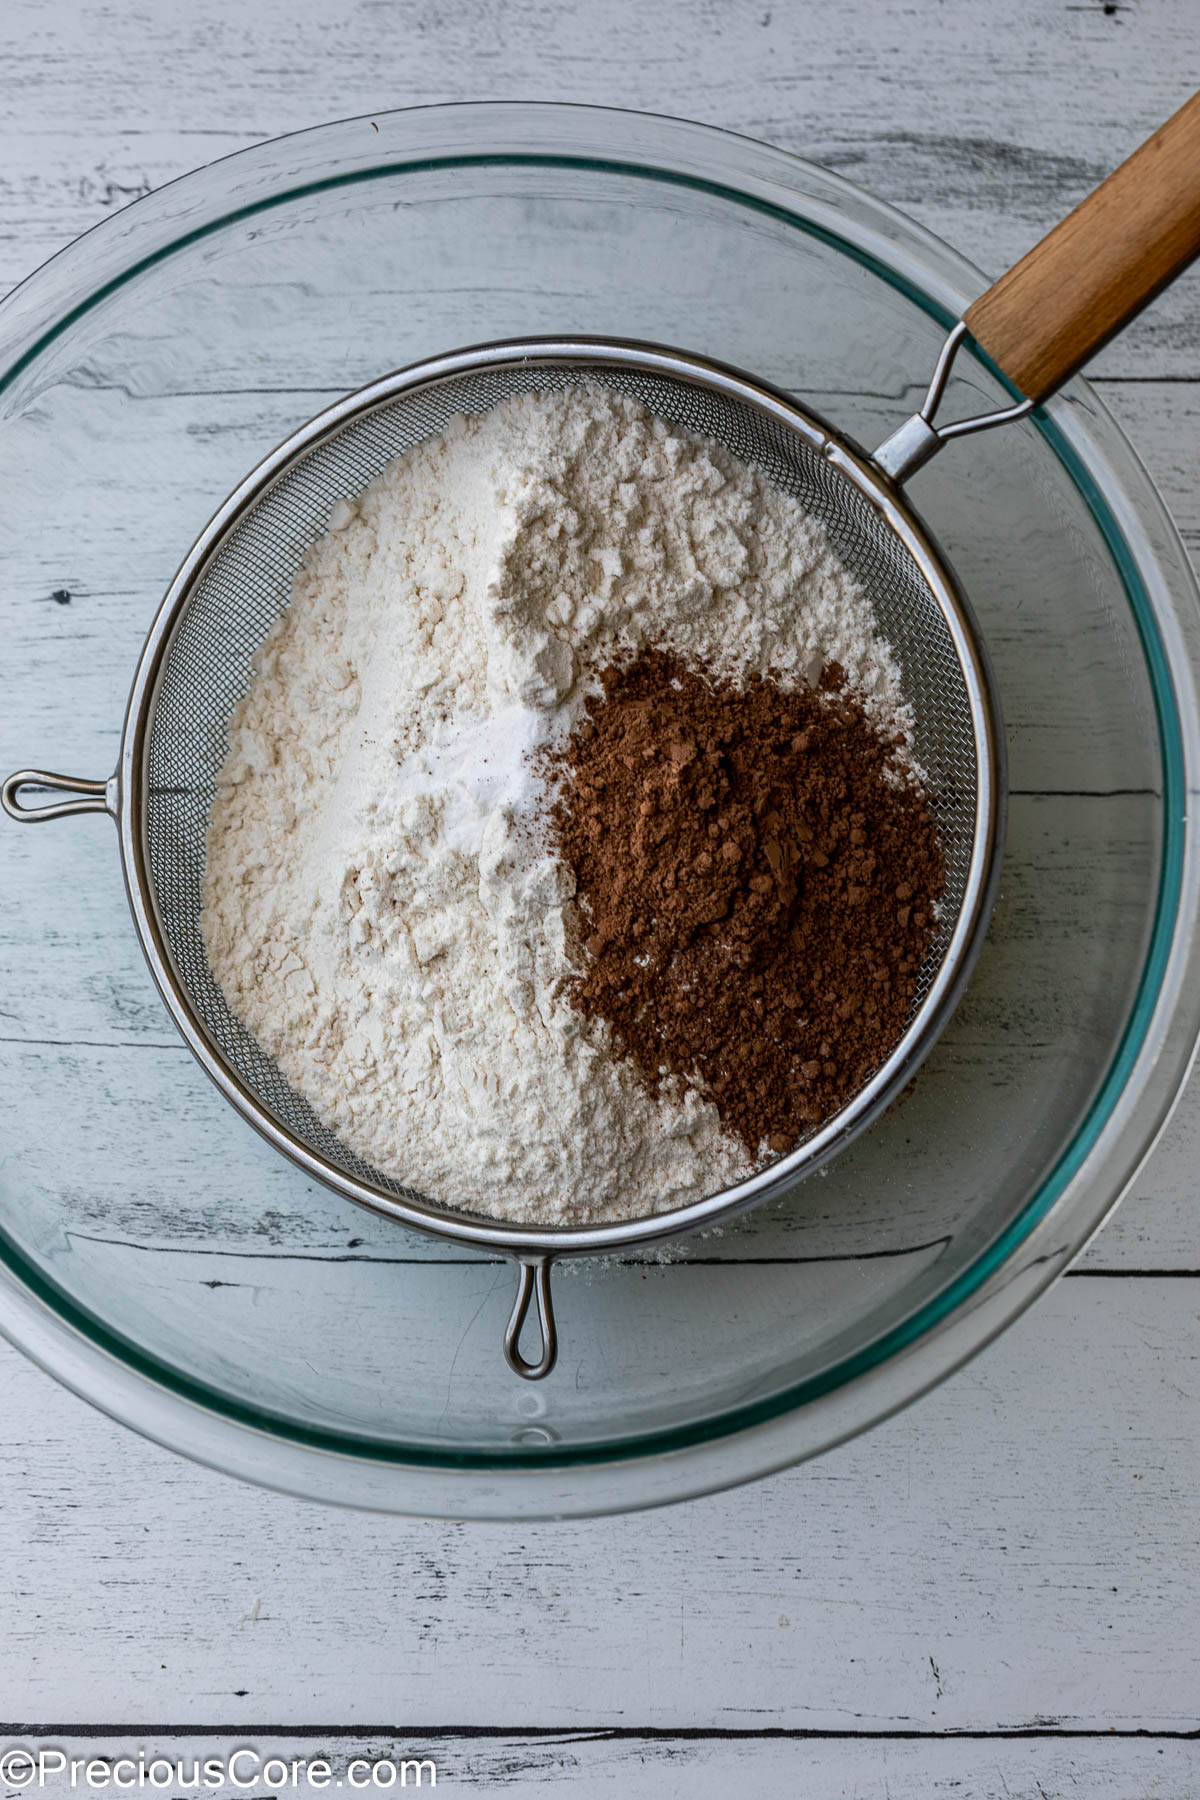
2. Separately, sift the necessary dry ingredients.
3. Cream the butter and sugar in a stand mixer fitted with the paddle attachment for about 5 minutes. Then, add the wet ingredients. So, add the oil, eggs, and the milk/vinegar mixture one at a time, stirring between each addition.
4. Gently add half of the flour mixture, mix together, then add the other half of the dry ingredients and mix until well incorporated.
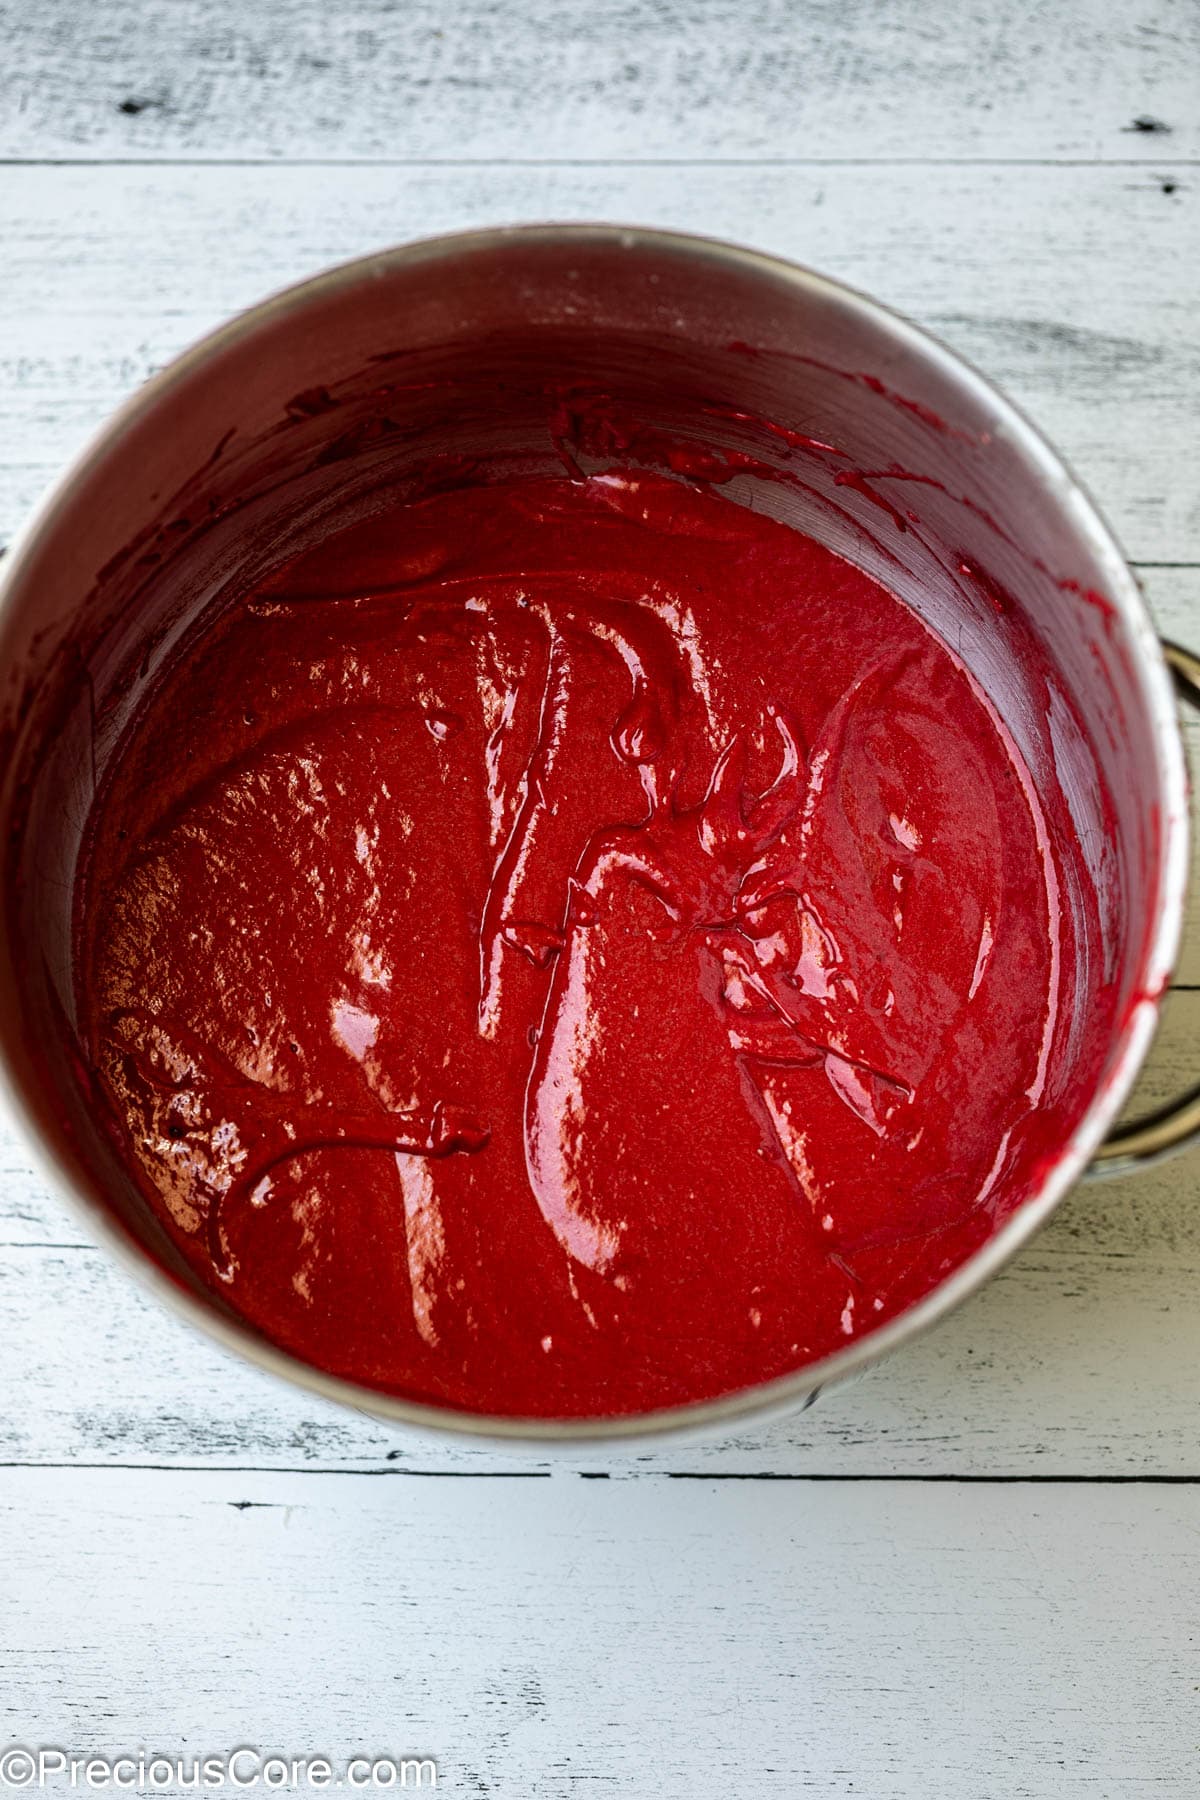
5. Add the red food coloring and mix until the batter is thoroughly dyed red.
6. Divide the batter into the prepared baking pans. I used 2 9-inch pans. You could use 2 8-inch pans for thicker layers or 3 6-inch pans for a smaller, taller cake. If you use pans that are different in size from mine, you’ll need to adjust the bake time and divide the frosting according to the cake layers.

7. Bake the cakes until a toothpick inserted in the middle comes out clean. The total bake time is about 22 minutes at 350 degrees F. Let the cakes cool in the baking pan, then turn them onto a wire rack to cool for about one hour.
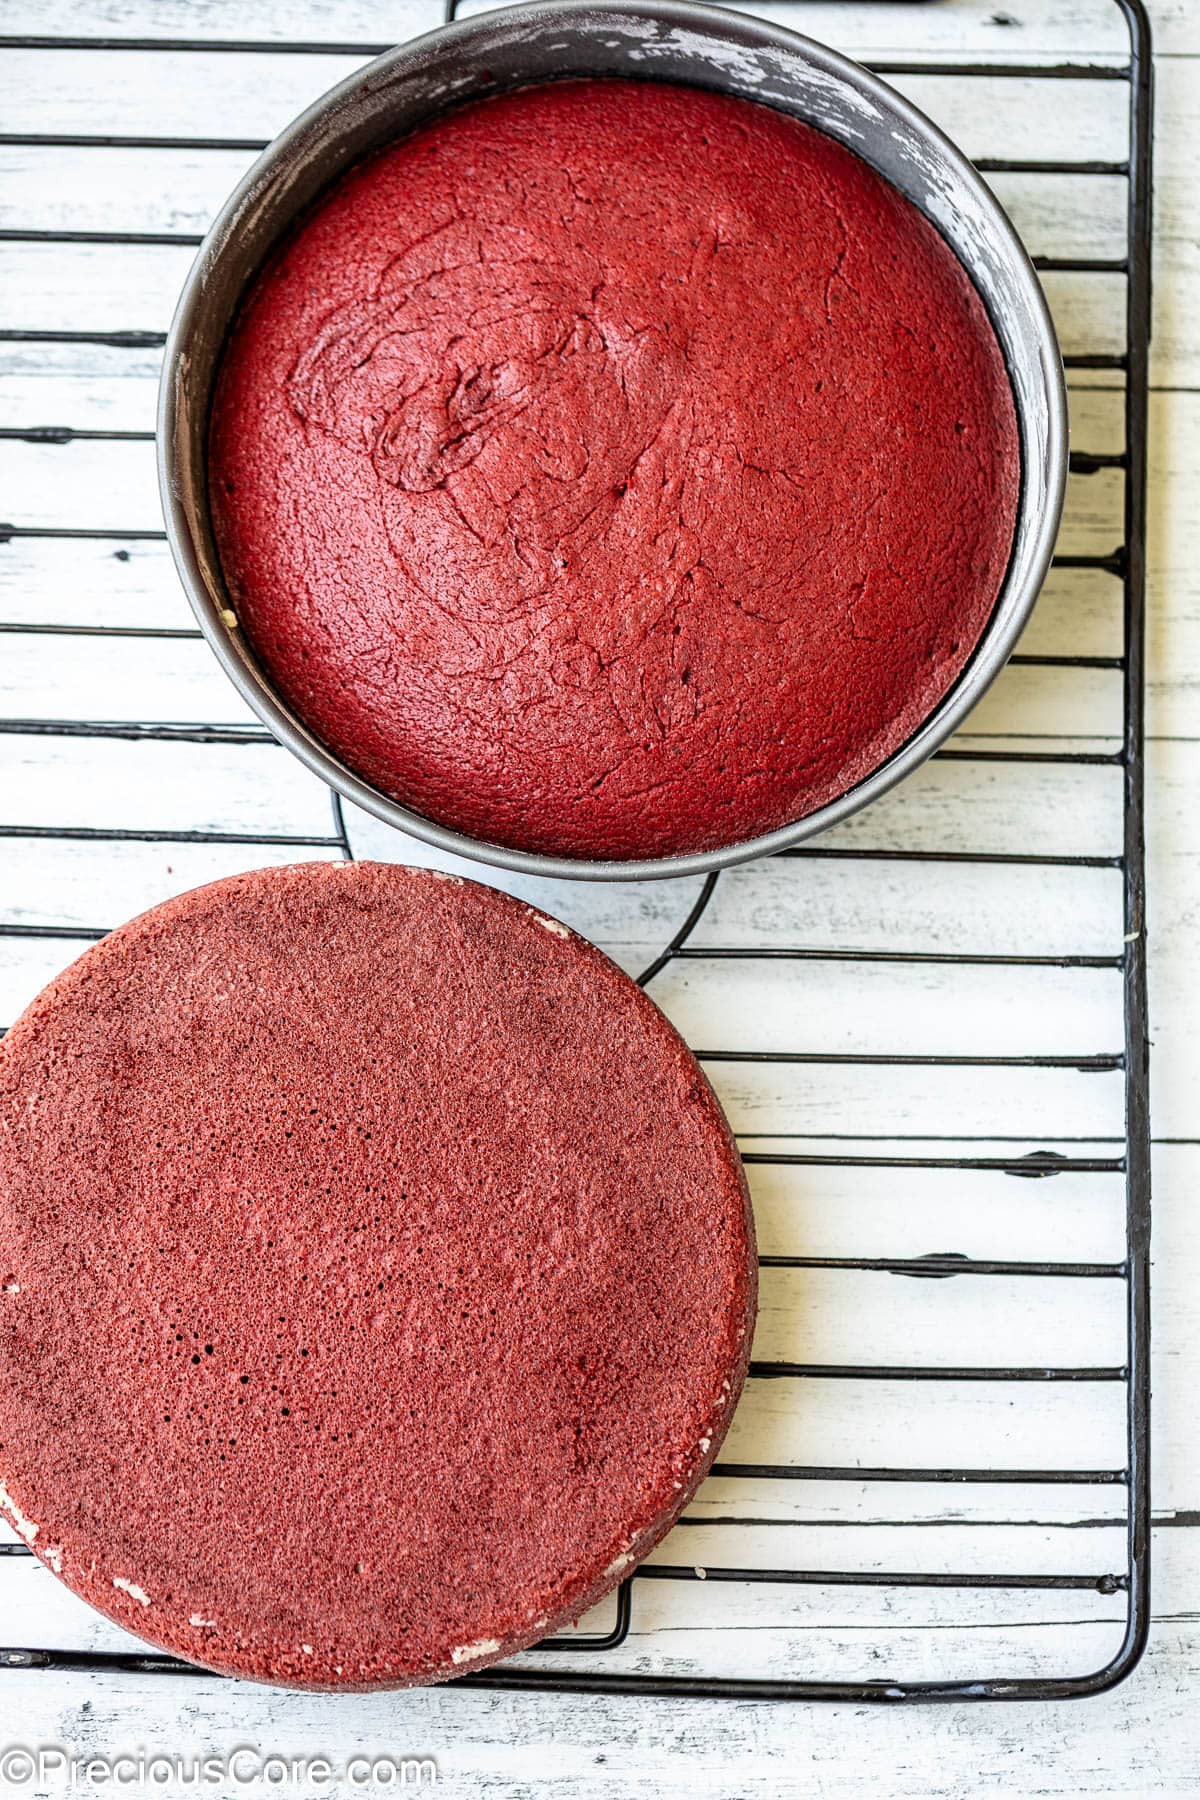
I love to turn the cakes upside down to cool. This helps level the top.
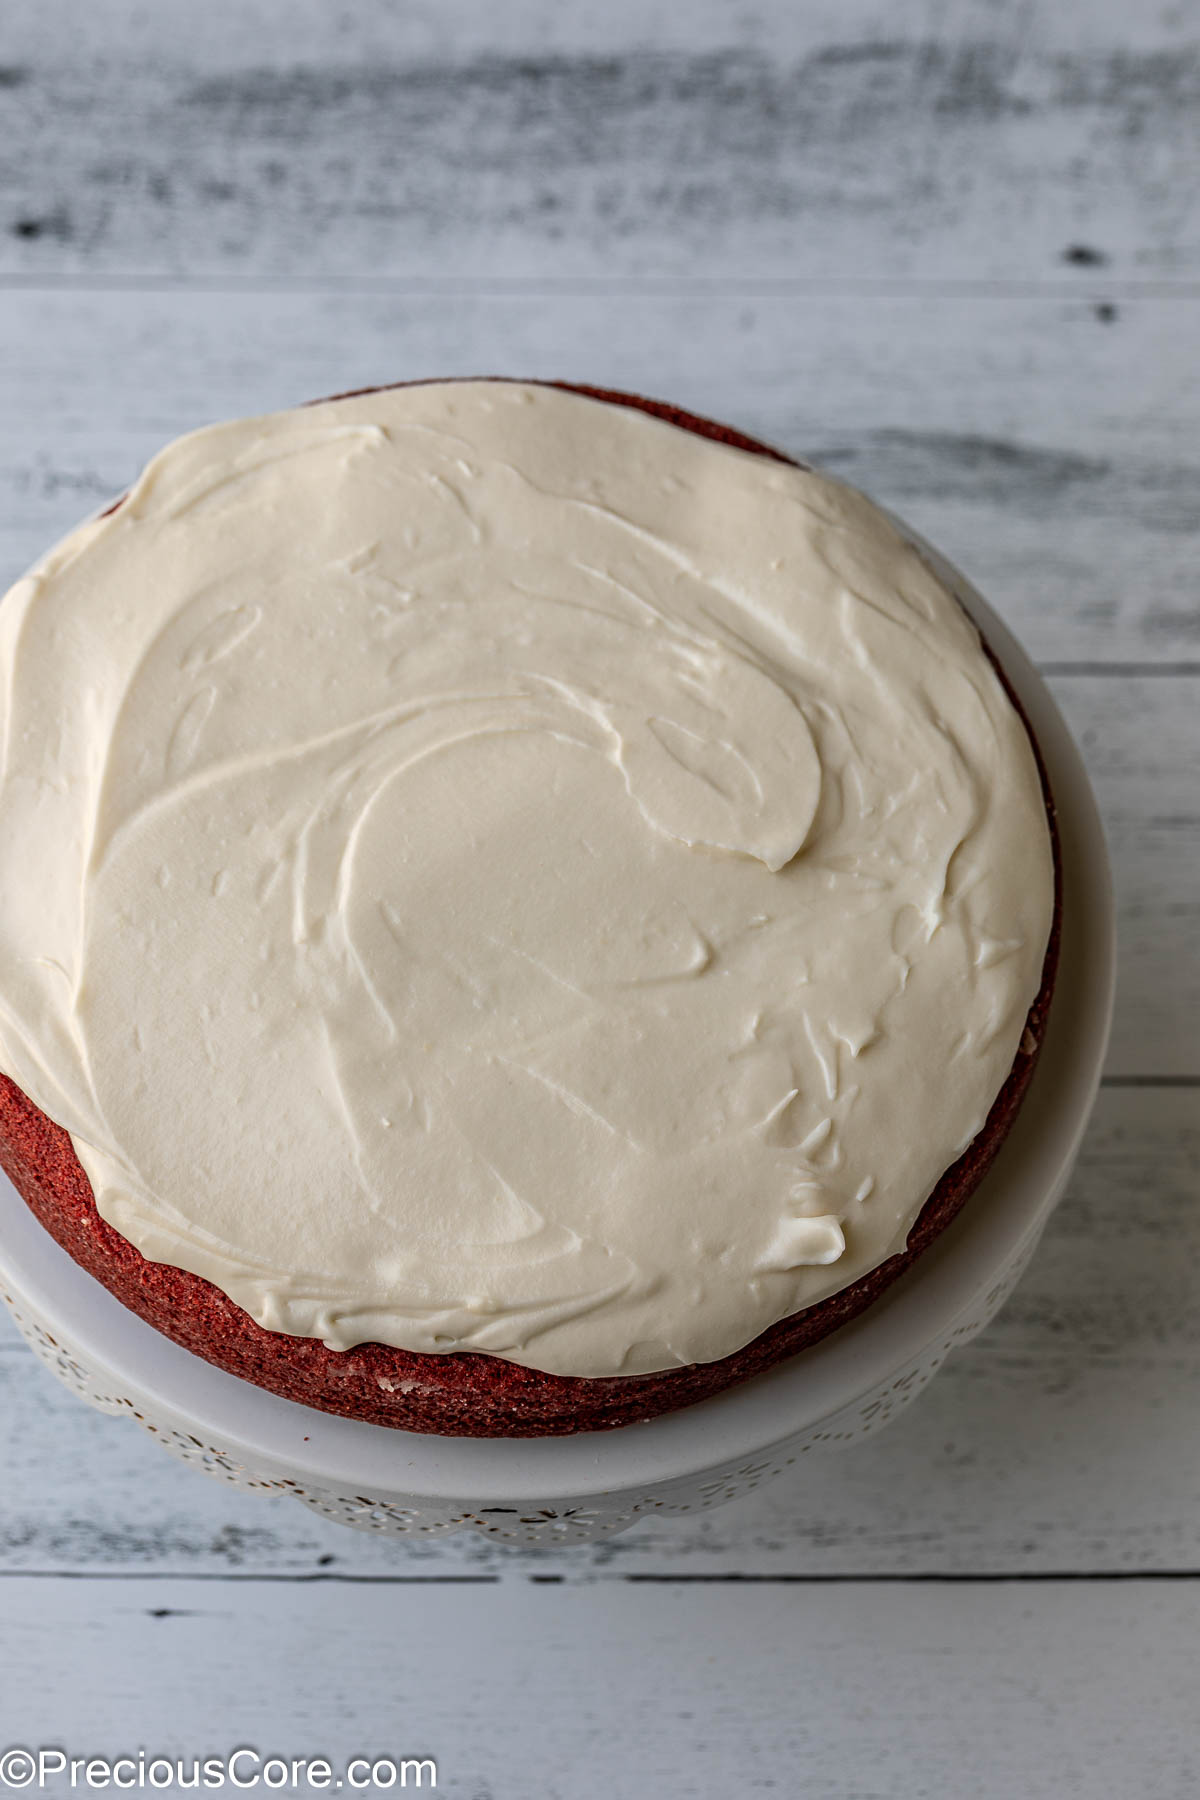
8. Make the frosting: Add softened butter and cream cheese to the bowl with the remaining ingredients, then beat the cream cheese mixture until light and fluffy.

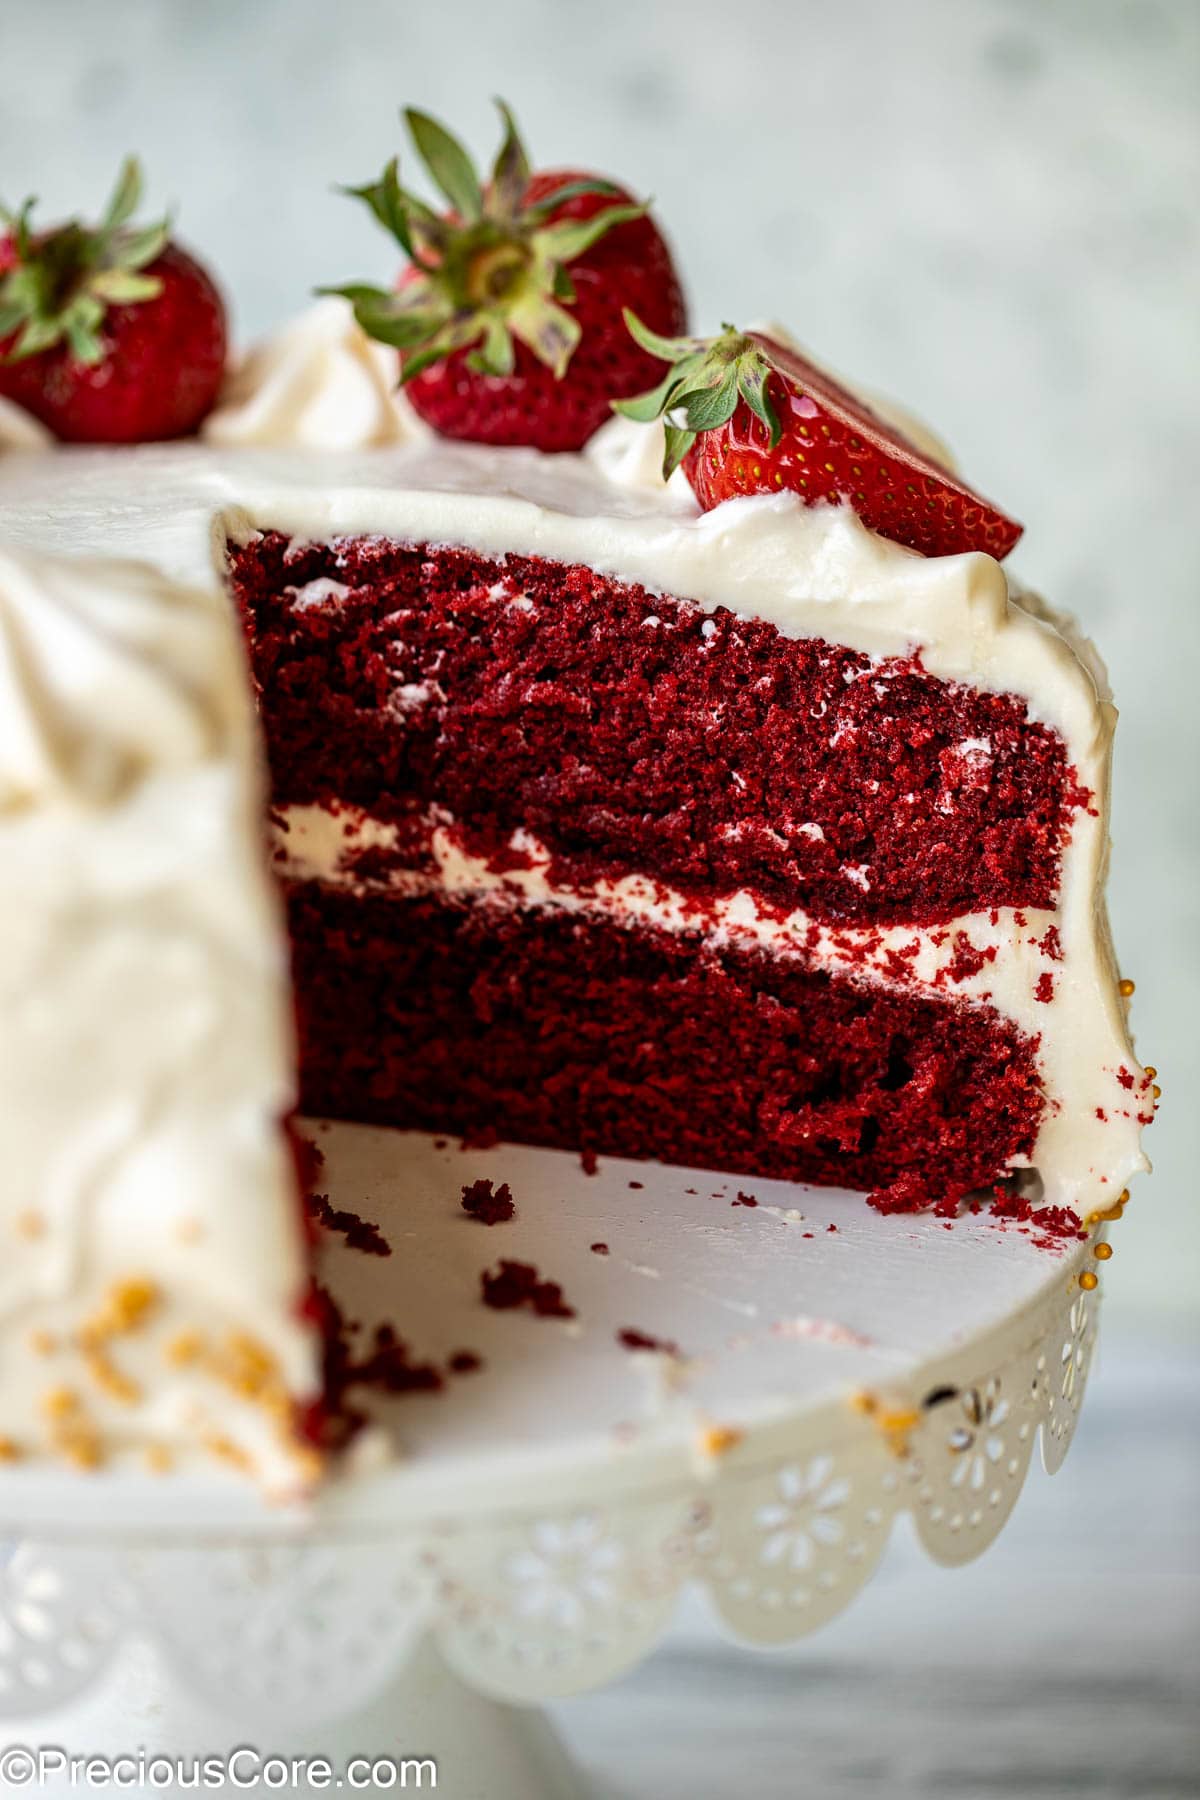
9. Fill and frost the cooled cake. Using an offset spatula, spread a layer of cream cheese frosting on top of one cooled cake.
Place the cake’s second layer over the cream cheese frosting spread, then spread more cream cheese frosting over the top of the cake.
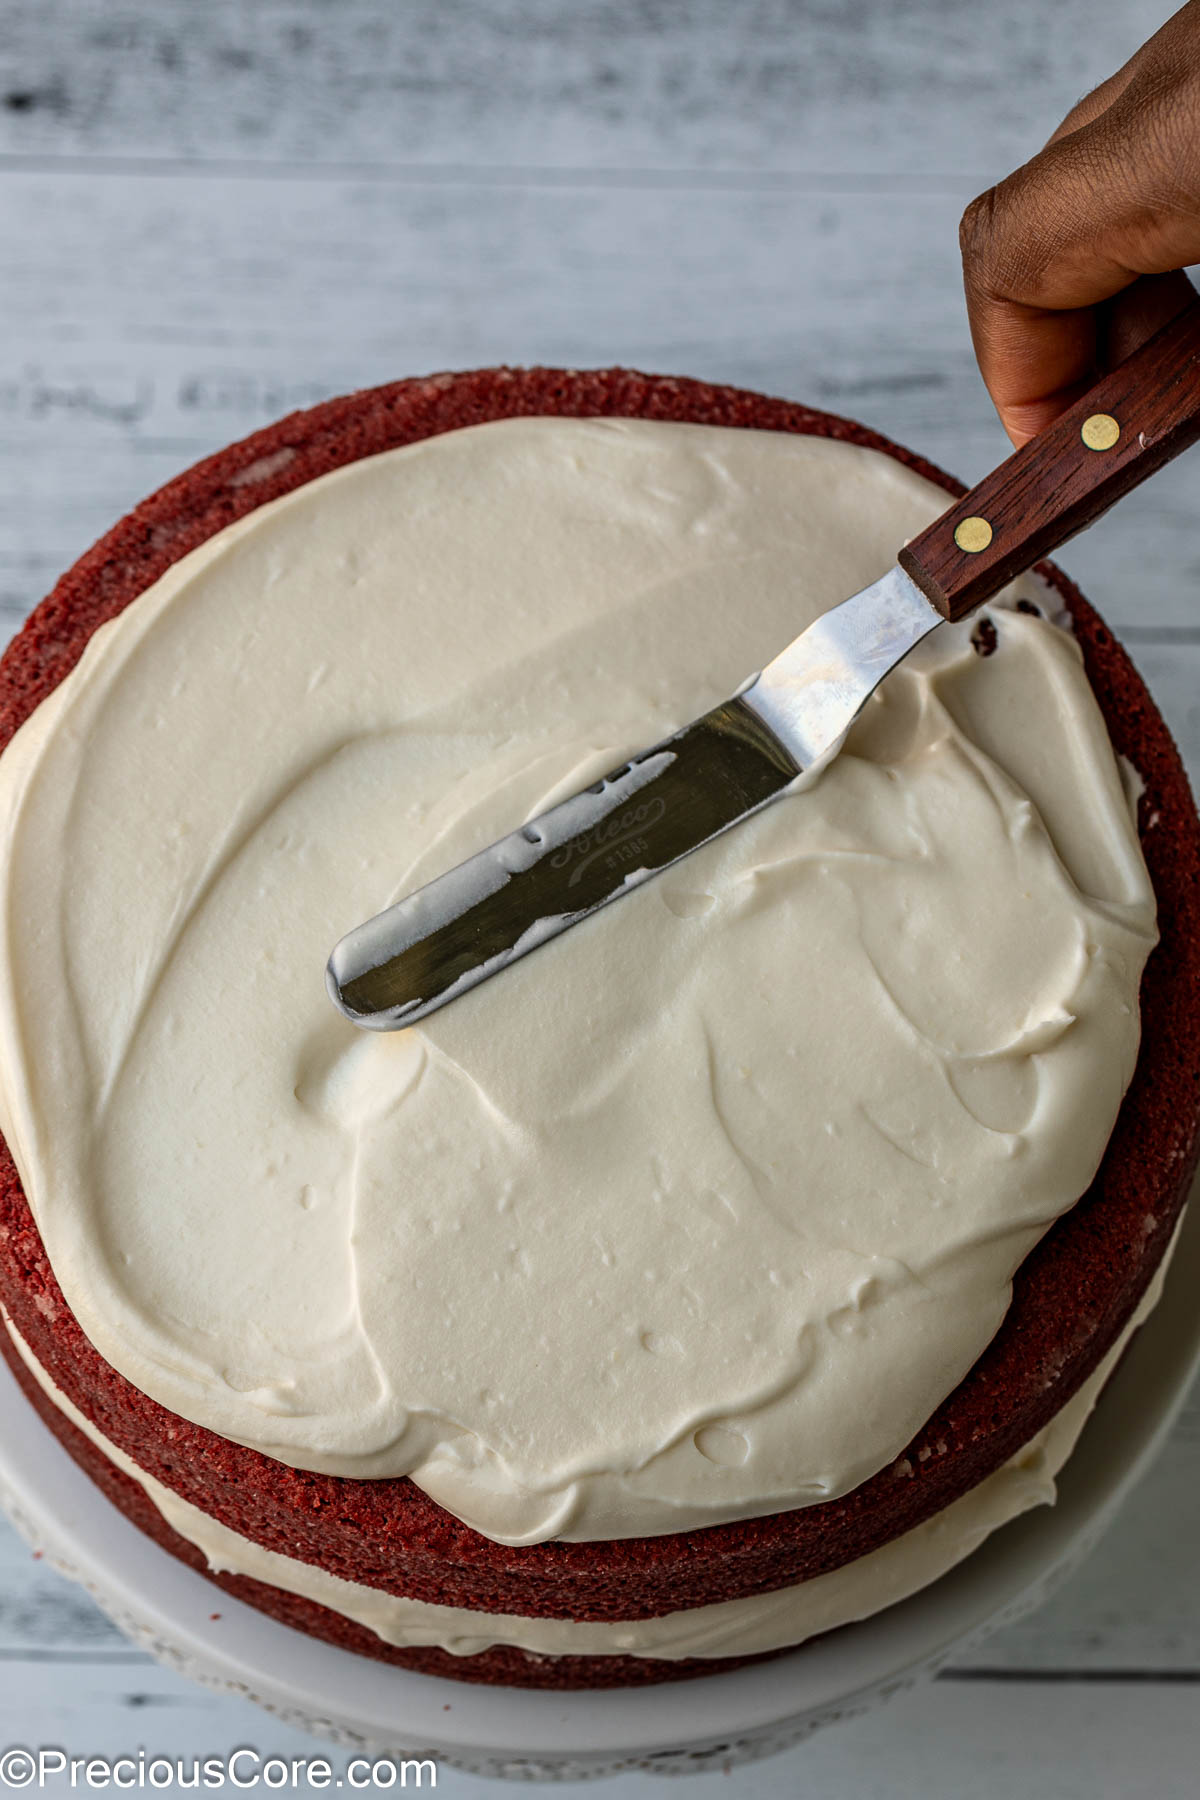
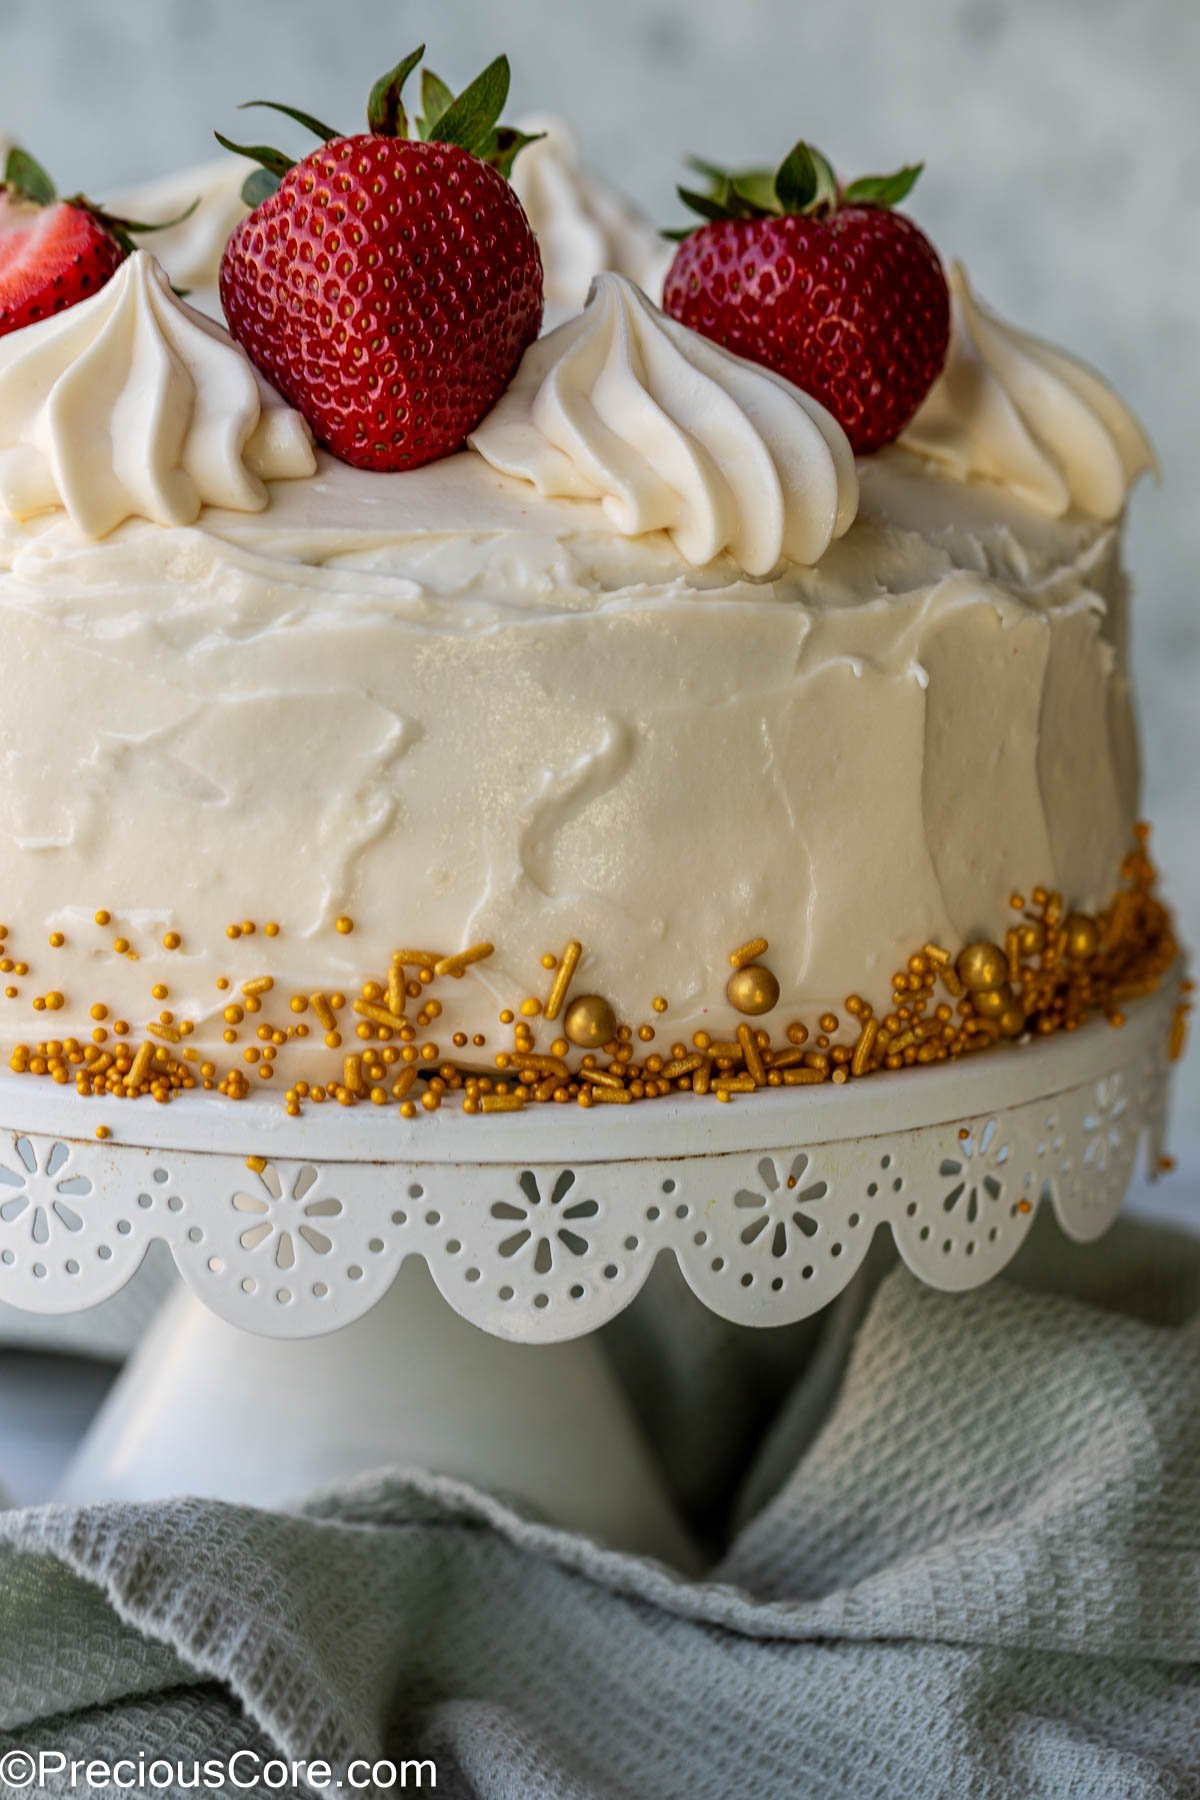
Finally, spread frosting all around the cake and smooth it to the best of your capabilities. If you have more frosting, add it to a Ziploc bag fitted with a star tip. Then, pipe pretty swirls of frosting over the cake to decorate it.
I love to add some fresh strawberries as decoration as well.
If you frost the cakes before they entirely cool, the frosting will melt and the cake won’t have enough structure to hold it. Make sure to wait until they are at room temperature before assembling the cake!
Another classic cake to check out is this Old Fashioned Carrot Cake.
Tips For Perfect Red Velvet Cake
- This batter will fit into other pans besides just 9-inch round cake pans! For example, you can divide the batter into two loaf cake tins (8 x 4 inches) or two rectangular baking dishes (11 x 7 inches). It will also fit into 8-inch rounds but will be a bit thicker, so you might need to extend the cooking time a bit (same with the loaf pans).
- Want to plan ahead? If you are making this cake for an event, I suggest baking the cake on one day, then making the frosting and decorating it on the next day! It is easy when you split up the project like this. After the first day, make sure to tightly wrap the cakes so they are ready for the next morning.
- If you have leftover frosted red velvet cake, it needs to be refrigerated because of the cream cheese icing. You can keep it in a cake container with a tall lid or keep it on a platter and carefully wrap it once the cream cheese frosting sets up and won’t stick to the plastic wrap.
FAQs About Red Velvet Cake
Red Velvet cake is a unique cake with a deep red color. The cake’s base is mostly vanilla–it isn’t a chocolate cake. The cocoa flavor isn’t strong. Instead, it has a subtle taste. The cake is commonly served with cream cheese frosting. The traditional recipe uses buttermilk, an acidic ingredient, to activate the baking soda in the recipe. However, my recipe uses a different method so that you can make this cake without buttermilk!
Homemade red velvet cake can still work without buttermilk, and you just need to make sure to include an acidic component in your recipe. You don’t have to worry, though; I have figured out the perfect buttermilk substitute for you! My recipe uses milk and vinegar. The vinegar helps to activate the leavening agent so the cake will rise perfectly and become fluffy.
Serving
This special occasion cake is amazing with different beverages, like tea or hot chocolate. You can also enjoy it with some ice cream, especially if you are celebrating something! Here are some serving ideas:
More Cake Recipes
Here are some of my favorite cake recipes! Check them out!

And when you want a cake that’s really simple but elegant, make this Italian Pear Almond Cake Recipe. For a crowd-pleasing make-ahead dessert, try my Challah Bread Pudding.
If you make this recipe please leave a star rating below. Your rating helps others find the recipe plus I love hearing from you! Thank you!
Red Velvet Cake Recipe Without Buttermilk
Ingredients
Red Velvet Cake
- 1 cup whole milk
- 1 Tablespoon white vinegar
- 2½ cups all-purpose flour
- ½ teaspoon salt
- 1 teaspoon baking soda
- 2 Tablespoons cocoa powder
- ½ cup softened butter unsalted
- 1 cup granulated sugar
- ¾ cup vegetable oil or any neutral oil
- 2 large eggs at room temperature
- 2 teaspoons vanilla extract
- 2 Tablespoons red food coloring
Cream Cheese Frosting
- 16 ounces cream cheese blocks softened
- 8 tablespoons butter softened
- 4 cups powdered sugar
- 2 teaspooons vanilla extract
Instructions
- Preheat oven to 350℉ (180℃). Grease and flour 2 9-inch cake pans.
- In a medium mixing bowl, combine the whole milk and white vinegar and set aside.
- Sift together the flour, salt, baking soda and cocoa powder.
- In a large mixing bowl or the bowl of a stand mixer set to medium speed and fitted with the paddle attachment, cream together the butter and sugar for about 5 minutes. Add the oil and mix to combine. Add the eggs and mix to combine. Add the milk and vinegar mixture and vanilla extract and mix to combine.
- With the mixer on low speed or mixing gently, add half of the flour mixture, mix to combine, then add the other half of the flour mixture and mix until well incorporated. Do not overmix.
- Add the red food coloring and mix until well combined,
- Pour half of the batter into each prepared baking pan. You can weigh each pan to make sure each baking pan has the same amount of batter.
- Bake in the preheated oven for 22 minutes until a toothpick inserted in the middle of the cakes comes out clean.
- Let the cakes cool in the pan for 10 minutes then transfer them onto a wire rack and let them cool completely for about one hour or more.
Frosting
- To make the frosting, beat the cream cheese, butter, powdered sugar, and vanilla extract until light and fluffy. If the frosting is too sweet, add salt to balance the sweetness. I suggest starting with a quarter teaspoon of salt, then adding more if needed.
- Fill and frost the cooled cake: Using an offset spatula, pread a layer of cream cheese frosting on top of one cake. Place the cake's second layer over the cream cheese frosting spread, then spread more cream cheese frosting over the second layer. Finally, spread frosting all around the cake and smooth it to the best of your capabilities. If you have more frosting, add it to a Ziploc bag fitted with a star tip. Then, pipe pretty swirls of frosting over the cake to decorate it. I love to add some fresh strawberries as decoration as well.
Notes
- This batter will fit into other pans besides just 9-inch round cake pans! For example, you can divide the batter into two loaf cake tins (8 x 4 inches) or two rectangular baking dishes (11 x 7 inches). It will also fit into 8-inch rounds but will be a bit thicker, so you might need to extend the cooking time a bit (same with the loaf pans).
- Want to plan ahead? If you are making this cake for an event, I suggest baking the cake on one day, then making the frosting and decorating it on the next day! It is easy when you split up the project like this. After the first day, make sure to tightly wrap the cakes so they are ready for the next morning.
- If you have leftover frosted red velvet cake, it needs to be refrigerated because of the cream cheese icing. You can keep it in a cake container with a tall lid or keep it on a platter and carefully wrap it once the cream cheese frosting sets up and won’t stick to the plastic wrap.


Hi, This cake was very good. I really enjoyed its unique flavor. I also cut back on the frosting ingredients by about 1/2 and it turned out great. Thank you Prescious, and next time maybe I’ll decorate it with strawberries. Blessings 😊
I’ve glad to hear that the frosting still worked with half of the ingredients!
Thank you for the feedback, Jo!
Hi, This cake sounds yummy I was wondering if the cake would be good without the frosting because l feel it’s too much powdered sugar for my liking, or if l cut back to 1.5 cup powdered sugar do you think that would work? Thank you in advance.
I think that would work, Jo. Please let me know how it goes.
Very good cake! I’m sitting here eating it straight out of the cupcake tin – no icing- and still think it’s excellent! Thank you
Thank you so much!
It was not bad! My family enjoyed this… but it tasted more like a chocolate cake than a red Velvet. Maybe I did it wrong, but seeing as I basically followed the recipe exactly, I think it relies too much on the food dye to make it a true red Velvet cake :/
Not bad tho!
Thank you for your honest review!
Loved how moist and thick this cake turned out. Only critique would be it needed just a little more punch, maybe adding some coffee or a little more cocao powder. Im going to experiment with that next time and see, but the cake itself, really delicious in texture.
Thank you for the helpful feedback, Jessalyn!
Loved how moist this cake and thick this cake turned out. Only critique would be it needed just a little more punch, maybe adding some coffee or a little more cocao powder. Im going to experiment with that next time and see, but the cake itself, really delicious in texture.